You’ve spent hours—maybe even days—crocheting that cozy blanket, that delicate lace shawl, or that adorable amigurumi toy. You’ve counted stitches, switched colors, and carefully followed every row. But now, as you hold your finished piece… it looks a little off. The edges curl. The motifs are uneven. The yarn sticks out in awkward places.
Sound familiar?
Here’s the truth: the finishing touches matter more than you think. In fact, many crocheters underestimate how much blocking and weaving in ends can elevate a project from “cute” to “show-stopping.” A well-finished piece doesn’t just look professional—it feels loved. It tells a story of patience, care, and attention to detail.
In this guide, we’ll walk through two of the most powerful yet often overlooked steps in crochet: blocking and weaving in ends. You’ll learn why they’re not just optional extras, but essential transformations that bring out the true beauty of your work. Whether you’re a beginner who just finished your first scarf or a seasoned crocheter looking to polish your craft, these simple techniques will make your creations look like they came from a boutique, not your couch.
We’ll break it down into easy, step-by-step methods you can do at home—with just a few basic tools. No fancy equipment. No stress. Just results. And by the end, you’ll see your projects in a whole new light.
Let’s get started.
Why Blocking Is the Secret Weapon Every Crocheter Needs
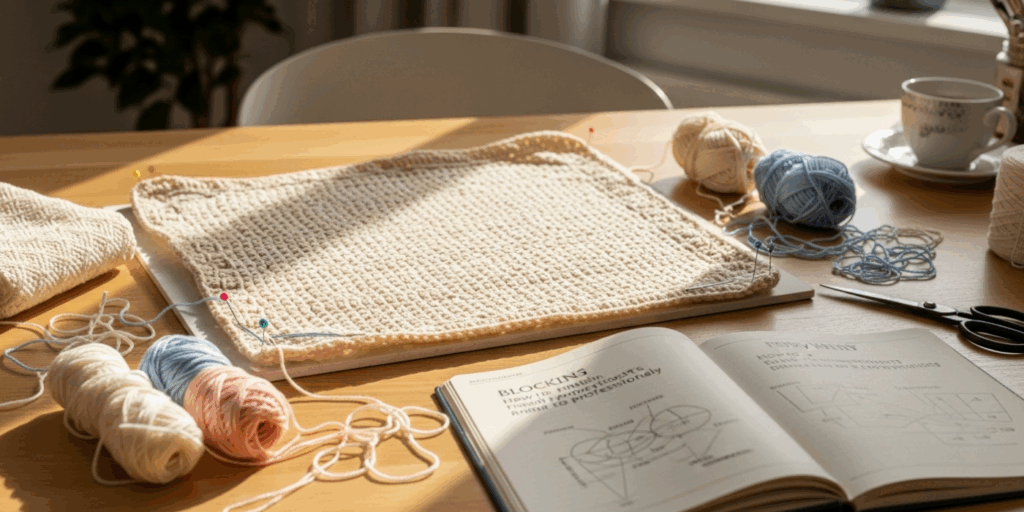
Imagine you’ve just finished a beautiful granny square blanket. You’ve joined all the squares, trimmed the loose threads, and proudly laid it out on your bed. But when you step back… the squares are slightly different sizes. Some are lopsided. The whole thing looks uneven, like a puzzle that didn’t quite fit.
That’s where blocking comes in.
Blocking is the process of shaping and setting your finished crochet piece to achieve a uniform, polished look. It’s not about making your work bigger—it’s about making it better. Think of it like ironing a shirt. You wouldn’t wear a wrinkled shirt to a job interview, right? The same goes for your crochet.
The magic of blocking lies in how it relaxes the fibers. Yarn has memory. When you crochet, you’re pulling and stretching those fibers in different directions. Blocking gently resets them, allowing your stitches to lie flat and even out any inconsistencies.
For example, lace shawls? They’re practically designed to be blocked. Without it, your delicate openwork looks like a crumpled napkin. With it? Suddenly, it’s a flowing, elegant piece that catches the light beautifully.
Even sturdy items like blankets and bags benefit. Blocking helps edges lie straight, corners become sharp, and motifs align perfectly.
And here’s the best part: you don’t need special tools. A clean towel, some pins, and a flat surface are all you need.
Pro tip: Always block before sewing pieces together. It’s much easier to align perfectly blocked squares than to try to fix misshapen ones after they’re joined.
Blocking isn’t just about looks—it’s about respect. Respect for the time you invested. Respect for the yarn you chose. And respect for yourself as a maker.
So next time you finish a project, don’t rush to the next one. Take 30 minutes to block it. You’ll be amazed at the difference.
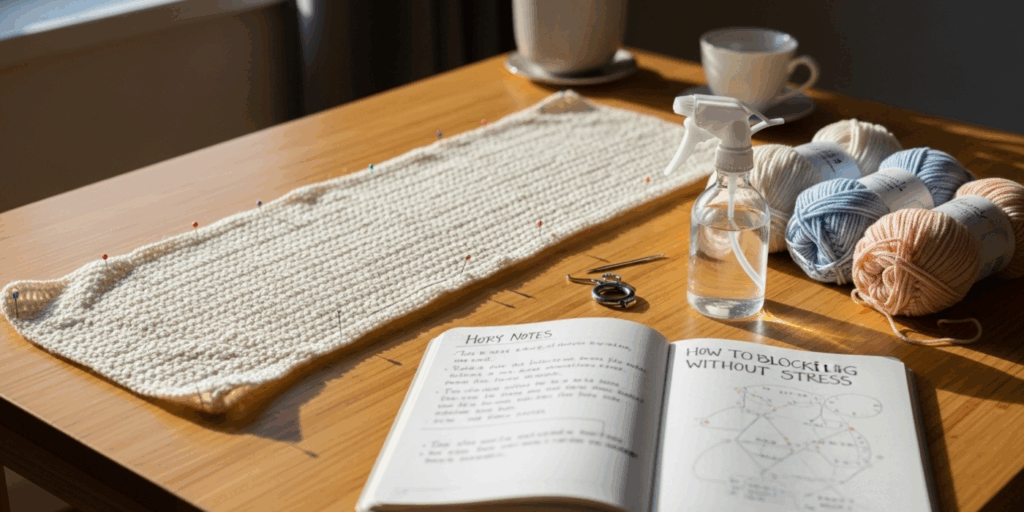
How to Block Your Crochet (Without the Stress)
Okay, so you’re sold on blocking—but how do you actually do it? Let’s break it down into simple, foolproof steps.
Step 1: Gather Your Supplies
You don’t need a fancy blocking mat or expensive pins. Here’s what you really need:
- A clean, flat surface (a bed, table, or even the floor)
- Rust-proof T-pins or sewing pins
- A measuring tape (optional but helpful)
- A spray bottle filled with water
- Towels (for drying)
Step 2: Wet or Steam?
There are two main methods: wet blocking and steam blocking.
- Wet blocking is best for natural fibers like cotton, wool, and alpaca. Soak your piece in lukewarm water for 15–20 minutes. Gently squeeze out the water—don’t wring!—then roll it in a towel to remove excess moisture.
- Steam blocking works great for synthetics (acrylic, blends) or delicate items like lace. Hold a steam iron a few inches above the fabric—never touch it!—and let the steam relax the fibers.
Step 3: Shape and Pin
Lay your piece flat on your surface. Gently stretch it into shape. Use your measuring tape to make sure all sides are even. For a square blanket, pin each corner and then along the edges to keep them straight. For a shawl, pin out the points to highlight the lace pattern.
Step 4: Let It Dry
This is the hardest part: waiting. Let your piece dry completely—this can take 12 to 24 hours. Don’t rush it. The fibers need time to settle into their new shape.
Bonus tip: If you’re blocking a large project like a blanket, use a clean sheet or plastic tarp under your towel to protect your floor or furniture.
And here’s the secret most people don’t tell you: blocking isn’t one-and-done. Over time, especially with frequent use, your piece might lose its shape. That’s okay. You can re-block it. Think of it like refreshing your favorite pair of jeans—just a little care keeps it looking new.
The Hidden Problem: Loose Ends That Ruin Your Work
Now, let’s talk about something most crocheters hate—but ignore at their peril: weaving in ends.
You’ve just finished your last row. You cut the yarn. You’re ready to celebrate. But those little tails sticking out? They’re not just “annoying.” They’re ticking time bombs.
Every loose end is a potential unraveling. A snag. A frayed edge. A yarn that pops out when you wash your blanket or tug on your scarf. And no one wants to spend their weekend fixing a crocheted gift that fell apart after one wash.
Weaving in ends isn’t glamorous. It’s tedious. But here’s the truth: it’s what separates amateur projects from heirloom-quality pieces.
Think of it like sewing a button on a shirt. If you just tie it loosely, it’ll fall off. But if you weave the thread through the fabric multiple times, it stays put for years. The same applies to crochet.
And let’s not forget aesthetics. A single stray end can ruin the clean lines of a delicate lace edge or the smooth surface of a baby blanket.
So how do you do it right?
The Needle Method (Best for Beginners)
Grab a yarn needle (the kind with a large eye). Thread your tail. Then:
- Weave the yarn under several stitches on the wrong side.
- Go back the other way, weaving through a few more stitches in the opposite direction.
- Trim the end close—but not too close! Leave about ¼ inch to prevent pulling out.
The Invisible Weave (For Seamless Looks)
For projects where you don’t want any bulk—like a seamless sweater or a smooth blanket—try this:
- Weave the tail along the back of the stitches, following the path of the yarn.
- Use the same direction as your original stitches.
- This makes the end disappear completely.
Pro tip: Always weave in ends before blocking. Blocking helps set the yarn in place and hides the ends even better.
And if you’re working with multiple colors? Don’t wait until the end. Weave in ends as you go. It’s easier, less overwhelming, and you’ll finish your project feeling 100% done—not half-finished.
The Power of Consistency: Why Finishing Matters More Than You Think
Let’s take a moment to zoom out.
Crocheting isn’t just about making things. It’s about creating with intention.
Think about the last time you received a handmade gift. Maybe it was a scarf from your mom, a blanket from a friend, or a stuffed animal from your niece. What made you cherish it?
It wasn’t just the stitches. It was the care. The thoughtfulness. The fact that someone chose to spend their time making something for you.
Now imagine that gift had loose ends sticking out. The edges were uneven. The colors looked messy. Would you still feel the same love?
Probably not.
Finishing your projects isn’t about perfection. It’s about presence. It’s about saying, “I didn’t just make this—I honored it.”
When you take the time to block and weave in ends, you’re not just tidying up. You’re completing a promise—to yourself, to the recipient, to the craft.
And here’s something beautiful: finishing well makes you a better crocheter.
Why? Because it forces you to slow down. To pay attention. To notice the details.
I once had a student who hated weaving in ends. She’d rush through it and then get frustrated when her projects looked “cheap.” After I showed her how to do it properly—and how it changed the look of her work—she told me: “I didn’t realize I was disrespecting my own effort.”
That hit me.
We don’t always give ourselves credit for the little things. But the truth is, the little things are what make your work yours.
So the next time you finish a project, don’t just cut the yarn and move on.
Take a breath.
Grab your needle.
Pin your piece.
Let it rest.
You’ve earned it.
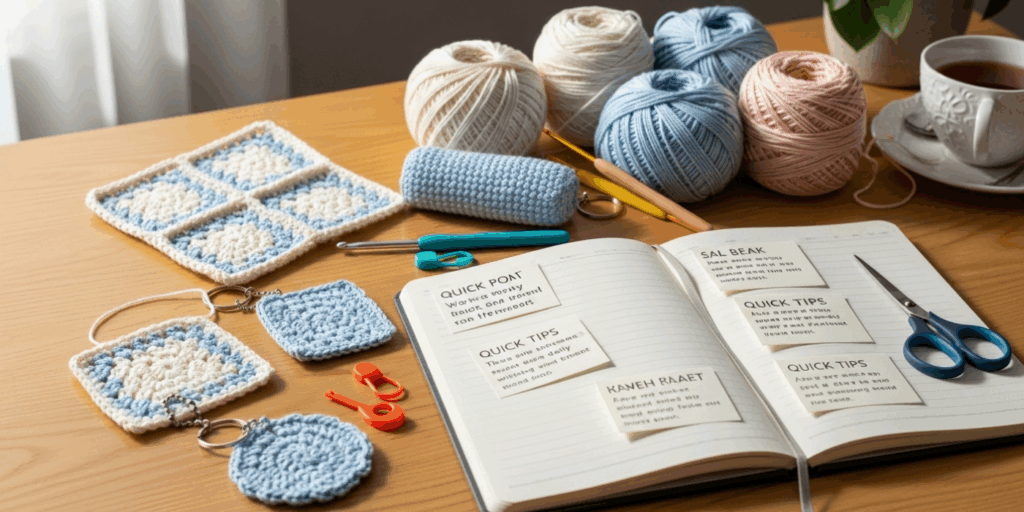
Practical Tips for Everyday Crocheters (No Time? No Problem)
I get it. Life’s busy. You don’t have hours to block a tiny coaster.
So here’s the good news: you don’t need to do it all the time.
Here’s how to prioritize:
✅ Always block:
- Lace shawls and doilies
- Garments (cardigans, vests)
- Blankets you plan to gift or keep for years
✅ Skip or simplify:
- Small items like coasters or dishcloths (a quick steam or gentle tug works)
- Amigurumi toys (just trim ends and fluff the yarn)
- Items that will be washed often (like baby blankets—blocking helps, but washing will reshape them anyway)
Quick Weaving Hacks for Busy Days:
- Use a latch hook or tapestry needle with a curved tip—they slide through stitches faster.
- Weave ends while watching TV. Make it part of your wind-down routine.
- Keep a small basket with needles and scissors near your crochet chair. Out of sight = out of mind.
One-Minute Blocking Trick:
Got a scarf that’s curling? Lay it flat on a towel, spritz lightly with water, then place a heavy book on each end. Wait an hour. Done.
And remember: you don’t have to be perfect. You just have to be consistent.
Even if you only block 3 out of 10 projects, you’ll notice a difference. And over time? You’ll start to want to finish every piece well.
That’s the magic.
It’s not about pressure. It’s about pride.
Your Finished Piece Deserves More Than a Quick Cut
Let me leave you with this thought:
Every stitch you make is a moment of your life.
When you finish a project, you’re not just ending a pattern—you’re closing a chapter. And how you close it matters.
Blocking and weaving in ends aren’t chores. They’re rituals. Small, quiet acts of love for the work you’ve poured your heart into.
They turn something made into something cherished.
So the next time you finish a crochet project—no matter how small—take five minutes to finish it right.
Pin it.
Spray it.
Weave it.
Let it rest.
And when you see how beautifully it lies, how smoothly the edges flow, how the colors come alive—you’ll understand why so many crocheters say: “I wish I’d known this sooner.”
You’re not just learning how to finish a project.
You’re learning how to honor your creativity.
And that? That’s worth every minute.
Ready to Transform Your Crochet?
Now it’s your turn.
Grab your next finished piece—yes, even that little hat you made last week—and give it one of these finishing touches.
Try blocking one corner. Weave in just one end.
Then step back.
Notice the difference.
That’s the power of small, intentional actions.
I’d love to hear from you:
👉 What’s the one crochet project you’ve been putting off finishing?
👉 Have you ever tried blocking? What was your experience?
Drop a comment below—I read every one. And if you found this helpful, share it with a fellow crocheter who needs this reminder.
Because no piece of handmade beauty should be left unfinished.
You’ve done the hard part. Now, let’s make it shine.
Happy crocheting. 🧶

Gabriela Ferreira is a passionate crochet and knitting enthusiast who finds inspiration in every skein of yarn she touches. With a love for color, texture, and handmade detail, she brings creativity and warmth to each project she creates. Gabriela believes that every stitch tells a story, and she enjoys sharing her craft with others who appreciate the beauty of fiber arts.


