Imagine holding a finished crochet blanket in your lap—vibrant swirls of coral, deep teal, and golden yellow dancing across the fabric like a sunset stitched by hand. You didn’t need a fancy machine. You didn’t need years of experience. Just your hook, some yarn, and the courage to try something new. That’s the magic of colorwork crochet.
If you’ve ever stared at a colorful crochet pattern and thought, “I could never do that,” this article is for you. Colorwork crochet—specifically the techniques of intarsia and tapestry—might seem intimidating, but they’re far more accessible than you think. Whether you’re a beginner who’s only ever worked in single colors or a seasoned crocheter ready to level up, mastering these methods opens a world of creative possibilities: from cozy blankets and bold hats to personalized gifts that feel truly one-of-a-kind.
In this guide, we’ll break down both intarsia and tapestry crochet into simple, bite-sized steps. No jargon. No confusion. Just clear explanations, real-life examples, and practical tips you can use today. You’ll learn how to manage multiple yarns without tangling, how to hide those pesky color changes neatly, and why these techniques are perfect for telling visual stories with your hook. Plus, we’ll share how colorwork can turn your crochet from “nice” to “wow”—and even help you relax and reconnect with the joy of making.
Let’s dive in. Your next colorful masterpiece is just a few stitches away.
Why Colorwork Crochet Is More Than Just Pretty Patterns
Let’s be honest: most of us start crocheting because it’s calming. The rhythm of the hook, the softness of the yarn, the quiet focus—it’s like meditation with a twist. But when you add color, something magical happens. It’s no longer just about texture or warmth. It becomes expression.
Think of colorwork as painting with yarn. Instead of using brushes, you’re using hooks. Instead of mixing pigments, you’re switching between skeins. And instead of a blank canvas, you’ve got a foundation row of stitches waiting to come alive. That’s why intarsia and tapestry crochet are gaining popularity—not just among crafters, but in mainstream design. From Instagram-worthy afghans to Etsy bestsellers, colorful crochet pieces are selling out fast because they feel personal, handmade, and full of soul.
And here’s the best part: you don’t need to be an artist to create stunning color patterns. You just need to understand the two main techniques—and how to choose the right one for your project.
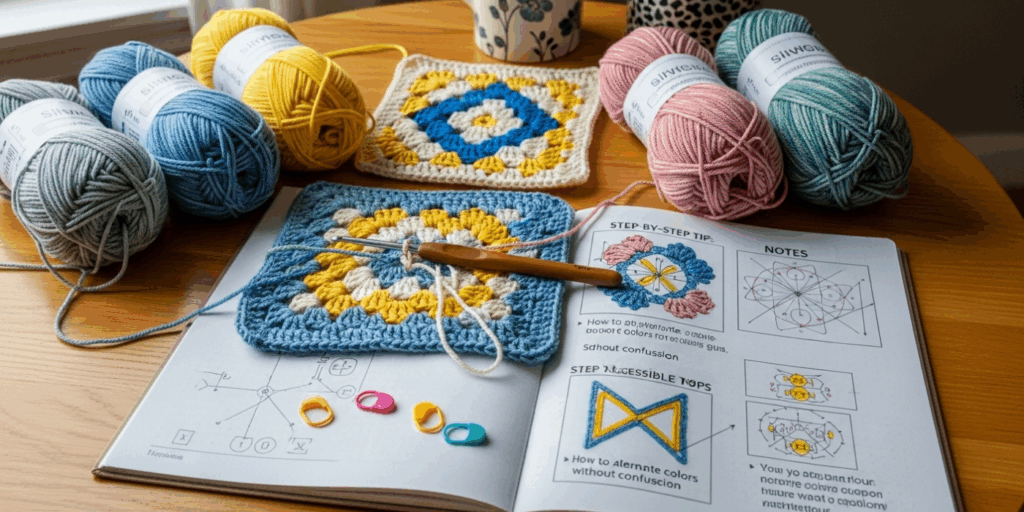
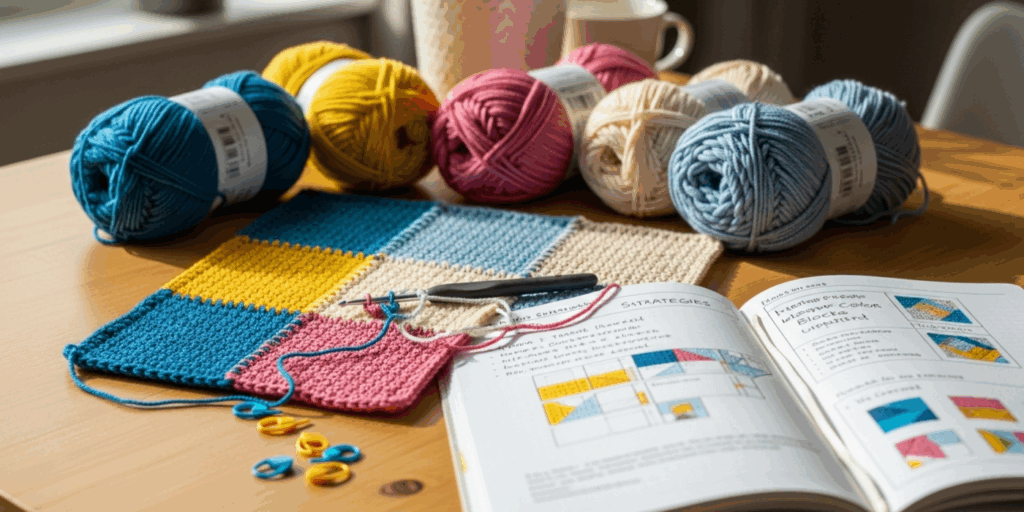
Intarsia is ideal for bold, geometric shapes—like hearts, stars, or large blocks of color. It’s like stitching a patchwork quilt, where each color is worked in its own separate section. Tapestry, on the other hand, is perfect for intricate, continuous designs—think Celtic knots, floral vines, or even portraits. It’s like weaving a tapestry with your hook, carrying the unused yarn along the back as you go.
The difference? Intarsia = separate yarn balls. Tapestry = yarn carried behind. That’s it. Once you grasp that, you’re 80% there.
Many crocheters avoid colorwork because they’ve seen tutorials where ten yarn balls are tangled in a knot, or the back of the work looks like a mess of floats. But with the right approach, you can avoid all that. And we’ll show you exactly how.
Colorwork isn’t just about looks—it’s about confidence. Every time you successfully switch colors without a snag, you’re proving to yourself that you can learn something new. And that’s a win no matter your skill level.
So whether you’re making a baby blanket with tiny elephants, a scarf with your favorite team’s colors, or a wall hanging that tells a story—colorwork lets you turn yarn into meaning.
Mastering Intarsia Crochet: The Art of Separate Color Blocks
Let’s start with intarsia, the technique that feels most like assembling a puzzle. Imagine you’re crocheting a square that’s half blue and half yellow. In intarsia, you treat each color as its own little project. You don’t carry the yarn across the back—you drop it, pick up the next, and let each color live only where it belongs.
Here’s how to do it step by step:
- Start with two (or more) bobbins or small balls of yarn. Don’t just pull from giant skeins—that’s how tangles begin. Wind each color onto a small card, a toilet paper roll, or even a plastic spool. This keeps things neat and manageable.
- Work your first color until you reach the point where you need to switch. Let’s say you’re crocheting a heart shape. You finish the left side in red, and now you need to start the right side in pink.
- Drop the red yarn. Yes, just let it go. Don’t pull it tight. Then pick up the pink yarn from behind the work and continue crocheting.
- Twist the yarns at the color change. This is the secret to clean edges. When you switch, simply twist the old and new yarn around each other once—like tying a tiny knot—before continuing. This prevents holes.
- Keep your yarn ends short. For small shapes, you’ll only need a few inches of each color. Leave a 4–6 inch tail to weave in later.
Pro tip: Use a tapestry needle to weave in ends as you go. It’s easier than waiting until the end when you’ve got 20 tails to hide!
Intarsia is perfect for motifs like animals, letters, or geometric designs. Think of it as coloring in a coloring book—you only fill in the area you’re working on. No floating yarn. No bulky backs. Just clean, crisp shapes.
A great beginner project? A simple sunrise blanket. Start with a yellow center, then add orange, then pink—all in separate blocks. Each row is a new color, and you switch only when the shape ends. It’s satisfying, meditative, and looks incredibly professional.
The best part? Because each color is isolated, your work stays lightweight and breathable. No thick, heavy backs weighing down your project.
And if you’re worried about managing multiple yarns? Start with just two. Master that. Then try three. You’ll be amazed how quickly your hands adapt.
Tapestry Crochet: Weaving Color Into Every Stitch
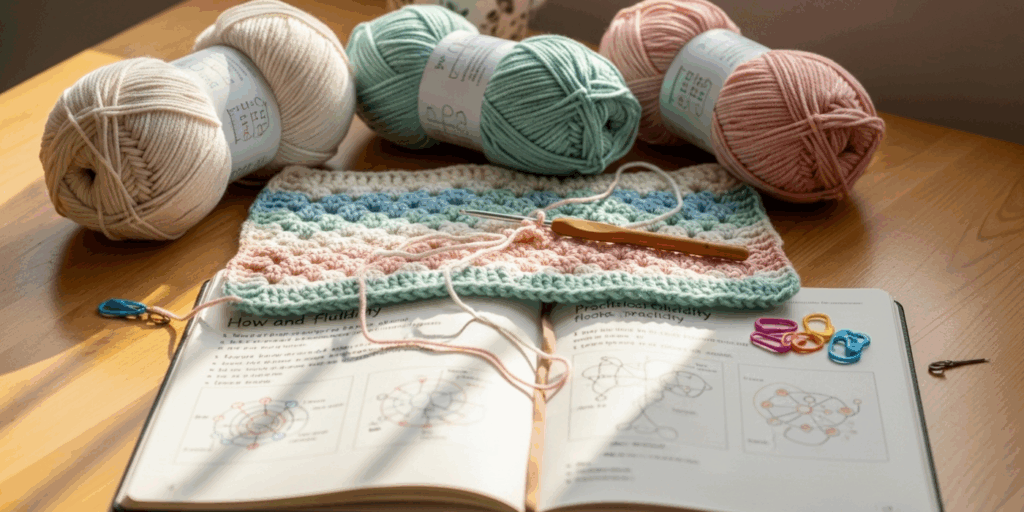
Now let’s talk about tapestry crochet—the technique that feels like magic. Here, you work with two or more colors in the same row, carrying the unused yarn invisibly along the back. It’s like knitting a rug with your hook, where every stitch tells a story.
Unlike intarsia, tapestry doesn’t require you to drop and pick up yarn constantly. Instead, you carry the non-working color behind your stitches, trapping it inside the fabric as you go. This creates a dense, durable fabric—perfect for bags, coasters, or even intricate portraits.
Here’s how to get started:
- Choose your colors wisely. Tapestry works best when the colors have similar thickness. If one yarn is bulky and another is fine, your tension will suffer. Stick to yarns from the same weight category.
- Hold both yarns in your non-dominant hand. This might feel weird at first, but it’s the key to control. Let the main color (the one you’re actively using) rest naturally, and let the carried color lie loosely behind.
- Work your stitches as usual—but don’t pull the carried yarn tight. You want it loose enough to avoid puckering, but tight enough so it doesn’t show on the front. Think “just right,” like Goldilocks.
- Change colors at the end of a stitch. Never switch mid-stitch. Complete your current stitch with the first color, then yarn over with the new color to begin the next.
Here’s the magic trick: When you switch colors, always work the first stitch of the new color over the carried yarn. This traps it neatly inside the fabric. No floats on the front. No gaps.
Tapestry is ideal for patterns with lots of detail: think Celtic spirals, tribal motifs, or even tiny faces on amigurumi. One of my favorite projects? A set of coasters shaped like flowers, each petal a different color, all flowing seamlessly from one to the next.
The downside? Tapestry can be denser and slower than regular crochet. But that’s also its strength. It’s sturdy. It holds its shape. And the back? Clean. Smooth. Almost invisible.
Try this: Make a small 4-inch swatch with just two colors. Do 10 rows of alternating stripes, carrying the yarn behind. Then flip it over. See how the unused color disappears? That’s the power of tapestry.
And here’s a bonus: because you’re carrying yarn, you don’t have dozens of ends to weave in. Just one or two per row. Less finishing work. More making time.
Avoiding Common Mistakes (And How to Fix Them Fast)
Let’s get real for a moment. Even the most experienced crocheters mess up colorwork sometimes. The good news? Most mistakes are easy to fix—and even easier to prevent.
Here are the top 3 mistakes—and how to dodge them:
1. Tangled Yarn Balls
This is the #1 reason people quit colorwork. Solution? Use bobbins. Wind 2–3 yards of each color onto a cardboard rectangle or a plastic bobbin. Keep them in a small basket or a cup next to you. No more yarn snakes!
2. Holes at Color Changes
Especially in intarsia. Solution? Always twist the yarns. Before you start the new color, loop the old yarn over the new one once. It’s a tiny twist—but it seals the gap like a zipper.
3. Bulky, Uneven Backs (Tapestry)
If your back looks like a mess of floating threads, you’re pulling too tight. Solution? Relax your grip. Let the carried yarn hang loose—like a slack rope. You can always gently tug it after a few rows to even it out.
Another pro tip: count your stitches religiously. Colorwork can make it easy to lose track. Use stitch markers every 10 stitches, or even a small tally counter. It’s a small habit that saves hours of frogging.
And if you do make a mistake? Don’t panic. Unravel just the last row. Most colorwork mistakes are fixable within 3–5 stitches. You’ve got this.
Turning Colorwork Into a Mindful Practice
Here’s something most tutorials don’t tell you: colorwork crochet isn’t just about the finished piece. It’s about the process.
When you’re switching colors, you’re forced to slow down. You’re not just repeating the same motion—you’re making decisions. Which color next? Where does the shape begin? How do I carry this without messing up?
It’s mindfulness in motion.
I once had a client, Sarah, who started crocheting after her husband passed away. She didn’t want to make a blanket. She wanted to make a memory. So she chose colors from his favorite shirt—navy, charcoal, and a touch of mustard yellow—and used tapestry crochet to create a pattern of tiny birds flying across the sky.
“I didn’t think I could do it,” she told me. “But every time I switched colors, I felt like I was talking to him.”
That’s the power of colorwork. It’s not just technique. It’s emotion.
So when you’re working on your next project, try this: breathe with each stitch. Inhale as you insert your hook. Exhale as you pull through. Let the colors guide your focus. You’re not just making a blanket—you’re making peace.
Getting Started: 3 Simple Projects to Build Your Confidence
Ready to try it yourself? Here are three beginner-friendly projects to build your colorwork skills—one step at a time.
1. Two-Color Coasters (Tapestry)
- Use worsted weight yarn.
- Chain 10, work in single crochet.
- Alternate colors every 2 rows.
- Carry the unused yarn behind.
- Finish with a slip stitch edging.
Why it works: Short, quick, and teaches you how to carry yarn without tension issues.
2. Color Block Pillow (Intarsia)
- Crochet a 12-inch square.
- Divide it into 3 vertical blocks: red, white, blue.
- Switch colors at the edge, twist, and weave in ends.
- Sew it shut and stuff with polyester fiberfill.
Why it works: Teaches you clean color changes and managing multiple bobbins.
3. Simple Gradient Scarf (Mixed Technique)
- Start with one color, then gradually introduce a second using intarsia for a stripe.
- After 6 inches, switch to tapestry for a subtle vine pattern.
- End with a solid border.
Why it works: Combines both techniques in one project. You’ll feel like a pro by the end.
You don’t need to be perfect. You just need to begin.
Final Thoughts: Your Hook, Your Colors, Your Story
Colorwork crochet isn’t about perfection. It’s about presence. It’s about choosing colors that make your heart skip a beat—and then having the courage to bring them to life, one stitch at a time.
Intarsia gives you bold, clean shapes. Tapestry gives you flowing, intricate detail. Together, they’re tools—not rules. Tools to turn yarn into joy, into memory, into art.
You don’t need expensive supplies. You don’t need to be an expert. You just need a hook, a little patience, and the willingness to try.
So grab two skeins of yarn. Pick a simple pattern. Make a swatch. Mess it up. Try again. Celebrate the little wins.
Because every time you switch colors, you’re not just changing yarn—you’re changing your story.
What’s your favorite color combination to crochet with?
Maybe it’s ocean blues and sandy neutrals. Or maybe it’s the bold red and green of your childhood holiday blanket. Share your combo in the comments below—I’d love to hear what colors speak to you. And if you’ve tried colorwork before, tell us what held you back… and what finally made you try again.
Don’t keep this magic to yourself. Pin this guide, share it with a friend who needs a creative spark, or tag someone who’d love to learn. Because the world needs more handmade color—and more people who believe they can create it.
Now go on. Pick up your hook. And make something beautiful.

Gabriela Ferreira is a passionate crochet and knitting enthusiast who finds inspiration in every skein of yarn she touches. With a love for color, texture, and handmade detail, she brings creativity and warmth to each project she creates. Gabriela believes that every stitch tells a story, and she enjoys sharing her craft with others who appreciate the beauty of fiber arts.


