Imagine walking into a room and feeling like the outfit you’re wearing was made just for you—not just in size, but in soul. The colors dance with your mood, the texture hugs your body like a second skin, and every stitch tells a story only you know. That’s the magic of custom crochet garments. Not mass-produced. Not off-the-rack. Not “close enough.” But yours—crafted with intention, patience, and love.
If you’ve ever stared at a sweater in a store and thought, “I wish this fit better… or looked different… or felt more like me,” then this article is for you. Designing your own crochet garments isn’t just a craft—it’s a form of self-expression, a rebellion against fast fashion, and a deeply rewarding creative journey. And the best part? You don’t need to be a professional designer or have years of experience to start. All you need is curiosity, a hook, and the willingness to try.
In this guide, we’ll walk you through the entire process—from finding your inspiration and choosing your first design, to selecting yarns, creating a personalized pattern, and finally stitching together a garment that feels like it was made for your body, your style, and your spirit. Whether you want to crochet a cozy cardigan for autumn walks, a statement top for date nights, or even a heirloom blanket-wrap for your future child, you’ll leave this article with the confidence to begin.
Let’s unravel the mystery—and start creating something truly yours.
1. Find Your “Why” Before You Pick Up Your Hook
Before you dive into stitch patterns or yarn swatches, pause for a moment. Ask yourself: Why do I want to make this?
Is it because you’ve struggled to find a sleeve length that fits your arms? Because you love bold colors but can’t find them in stores? Or maybe you just crave the quiet joy of making something with your hands after a long day?
Your “why” is your compass. It’s what will keep you going when your first attempt looks more like a lopsided potato than a sweater. It’s why you’ll rework that neckline for the third time—not because you’re stubborn, but because you care.
Think of it like choosing a recipe. You wouldn’t bake a cake just because it’s trending—you’d bake it because you love the flavor, the aroma, the way it makes you feel. The same goes for crochet.
Start by gathering inspiration. Flip through Pinterest boards, scroll through Instagram hashtags like #customcrochet or #slowfashioncrochet, or visit local artisan markets. Pay attention to what catches your eye: Is it the drape of a lace shawl? The structure of a cropped top? The chunky texture of a oversized cardigan?
Jot down notes:
- I love soft, flowy fabrics.
- I want something warm but breathable.
- I’m drawn to earthy tones with pops of mustard yellow.
Write these down. Keep them visible. They’ll guide every decision you make—from yarn choice to stitch pattern. And remember: your “why” doesn’t have to be grand. Sometimes, the most powerful designs come from the smallest desires—like wanting to feel cozy in your own skin.
2. Know Your Body (and How to Measure It)
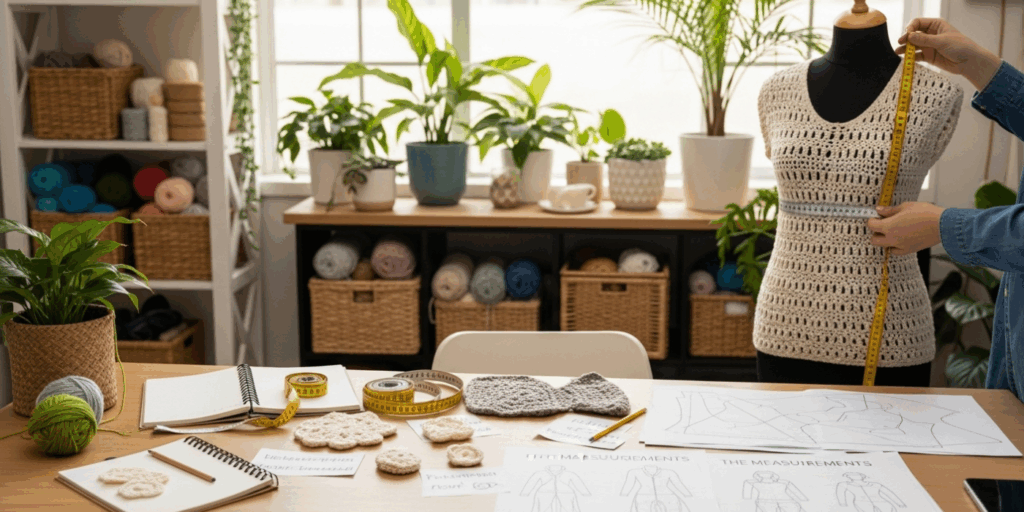
Here’s the truth: even the most beautiful crochet pattern won’t look right if it doesn’t fit you. And no, “one size fits most” doesn’t work in crochet. Unlike knitwear, crochet tends to be less forgiving when it comes to stretch and drape. That’s why measuring yourself accurately is non-negotiable.
Grab a soft measuring tape (a fabric one, not a metal ruler), wear snug-fitting clothes, and take these five key measurements:
- Bust/Chest – Measure around the fullest part.
- Waist – The narrowest part of your torso.
- Hips – The widest part of your lower body.
- Arm Length – From shoulder to wrist, with arm slightly bent.
- Torso Length – From the top of your shoulder (where the neck meets the shoulder) down to where you want the garment to end.
Don’t guess. Don’t estimate. Write these numbers down. Then, compare them to standard sizing charts (like those from the Craft Yarn Council). But here’s the secret: use your measurements, not the chart. Charts are guidelines. Your body is the rule.
Pro tip: Take measurements while standing naturally—not sucking in or standing too tall. And if you’re planning a fitted top, add 1–2 inches of ease for comfort. For oversized pieces, add 4–6 inches. Ease = breathing room. Don’t skip it.
I once made a stunning lace top… that I couldn’t get over my hips. Why? Because I didn’t measure my hips. Lesson learned. Don’t be me.
Once you have your numbers, sketch a simple outline of your garment on paper. Think of it as a blueprint. It doesn’t have to be artistic—just clear. A rectangle for the body, two tubes for sleeves, a neckline shape. This visual will help you translate your measurements into stitches later.
You’re not just making clothes. You’re making comfort. And comfort starts with knowing your shape.
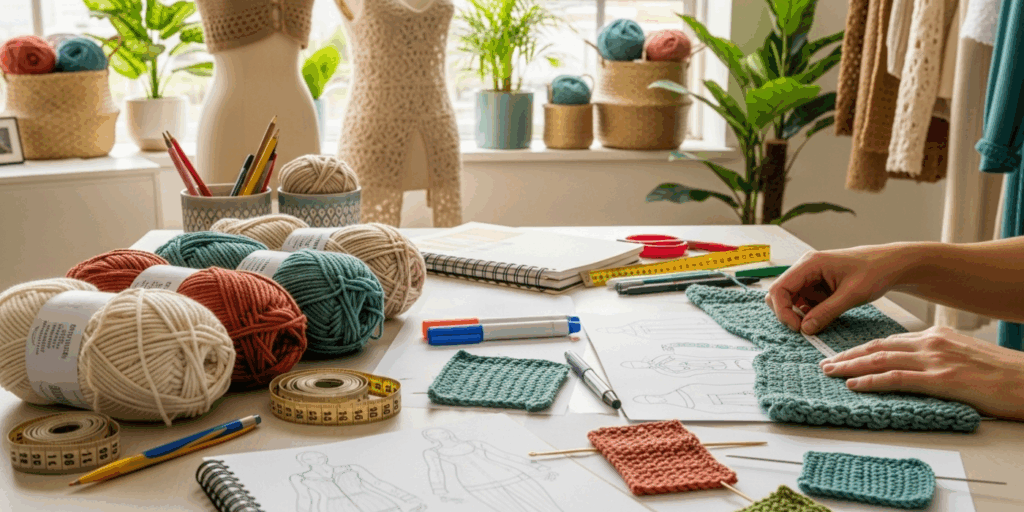
3. Choose Yarn That Speaks to Your Vision
Yarn isn’t just material—it’s mood. Texture. Temperature. Personality.
Think about the season, the occasion, and the feeling you want to evoke. Want something lightweight and breezy for summer? Go for cotton or bamboo blends. Dreaming of a winter blanket-coat? Wool or alpaca will keep you warm and cozy.
Here’s a quick cheat sheet:
- Cotton: Breathable, durable, great for summer tops. Feels crisp at first, softens with washing.
- Wool: Warm, elastic, perfect for structured pieces. Great for beginners because it holds shape well.
- Acrylic: Affordable, easy to care for. Good for practice pieces, but can feel “plasticky.”
- Alpaca: Luxuriously soft, warmer than wool, but less elastic. Best for drapey, oversized items.
- Bamboo/Linen: Cool, silky, and slightly stiff. Beautiful for elegant, flowy designs.
Also, consider weight. Yarn comes in categories (from lace to super bulky). Most garments use worsted weight (Category 4)—it’s the Goldilocks of crochet: not too thin, not too thick.
And color? Oh, color matters. Don’t just pick what’s on sale. Hold skeins next to your skin. Does it make your eyes glow? Or wash you out? Try natural lighting. Avoid harsh fluorescent lights.
I remember making my first custom cardigan in a deep forest green. I loved it in the store. But at home, under my bathroom light? It looked muddy. I almost gave up—until I tried a mossy teal. Suddenly, everything clicked. Color isn’t just aesthetic. It’s emotional.
Buy a little extra yarn. Always. Running out mid-project is the worst kind of heartbreak.
4. Start Small: Master One Piece Before You Conquer the Whole Wardrobe
I know you’re excited. You want to make that stunning lace-trimmed maxi dress. Or that oversized poncho with tassels. And that’s beautiful. But here’s the truth: big projects are intimidating.
Start small.
Begin with a simple tank top. Or a cropped cardigan. Or a cowl neck wrap. Something with minimal shaping, no sleeves, or just basic rectangles. Why? Because you need to learn how your stitches behave.
Crochet stitches behave differently than knitting. Single crochet is dense. Double crochet is open. Treble crochet is tall and airy. Each one affects drape, warmth, and fit.
So, make a swatch. Yes, really. A 4×4 inch square. Use the hook size recommended on the yarn label. Then, wash and block it (lay it flat to dry). Measure it again. Did it shrink? Stretch? Change texture?
This swatch tells you everything:
- How many stitches = 1 inch
- How many rows = 1 inch
- How the fabric will behave when worn
Now you can calculate your pattern. If your bust is 38 inches and your swatch shows 4 stitches per inch, you’ll need 152 stitches across. Simple math. Powerful control.
And here’s the best part: once you’ve nailed one piece, you’ll understand the principles. Then, scaling up to a full sweater? That’s just adding sleeves and shaping. You’ve already done the hard part.
I made my first custom piece—a cropped tank—in two days. It wasn’t perfect. But I wore it. And I felt proud. That confidence carried me through my next project… and the next.
Small wins build big dreams.
5. Learn to Read and Modify Patterns (Even If You Don’t Write Them)

You don’t have to write a pattern from scratch to design something custom. In fact, most crocheters start by modifying existing ones.
Find a free pattern online—say, a basic raglan sleeve sweater from Ravelry or a YouTube tutorial. Then, tweak it.
- Want it longer? Add 5 rows to the body.
- Prefer a V-neck? Decrease stitches gradually instead of making a round neck.
- Love fringe? Add it to the hem.
- Too tight in the shoulders? Increase your stitch count at the yoke.
Patterns are templates—not rules. Think of them like a recipe for chocolate cake. You can swap out the sugar for maple syrup, add nuts, or make it gluten-free. The structure stays, but the soul changes.
Use graph paper or free tools like Stitch Fiddle (a free online crochet grid tool) to visualize your changes. Sketch your modifications before you crochet. It saves time, yarn, and frustration.
And here’s a pro tip: When modifying, always keep track of your changes. Write them down in a notebook or digital doc. “Added 10 stitches at underarm,” “Used size H hook instead of G.” This becomes your pattern library—and someday, you might share it with others.
You’re not copying. You’re collaborating—with designers, with your past self, with future you.
6. Embrace the “Ugly Phase” — And Keep Going
Let’s be real: your first custom garment won’t look like a magazine spread. It might have uneven edges. The sleeves might be too long. The neckline might twist. And that’s okay.
Crochet is forgiving, but it’s also honest. It doesn’t hide mistakes—it shows them. And that’s the beauty.
I once spent 30 hours on a lace shawl that ended up looking like a crocheted pancake. I cried. I nearly burned it. But then I cut it into squares and made a pillow. And guess what? It was beautiful. Because it was mine.
Every mistake teaches you something:
- If your edges curl? You need more stitches or a different hook.
- If it’s too stiff? Try a larger hook or a softer yarn.
- If the color looks dull? Try a different shade next time.
Don’t compare your beginning to someone else’s middle. Your journey is yours alone.
And here’s the secret: the more you make, the more intuitive it becomes. You’ll start feeling when a stitch is wrong. You’ll notice tension changes before you even see them. That’s when crochet stops being a skill—and becomes a language.
Trust the process. Even the ugly phases are part of the design.
7. Make It Yours: Add Personal Touches That Tell Your Story
Here’s where magic happens.
Once the structure is there, it’s time to personalize. This is where your garment stops being “a crochet top” and becomes your top.
Add a hidden pocket for your keys.
Embroider your initials on the inside hem.
Use leftover yarn to crochet tiny flowers and sew them on like badges.
Change the button style to vintage glass ones from your grandma’s collection.
I once made a cardigan with pockets lined in soft flannel—because I love the feeling of warmth when I reach in. No one else would know. But I did. And that made all the difference.
You can also experiment with texture:
- Alternate between puff stitches and single crochet for a ribbed effect.
- Add a fringe border with tassels in your favorite color.
- Use variegated yarn to create your own “rainbow” without planning a thing.
These aren’t just decorations. They’re memories. They’re whispers of who you are.
And when you wear it? You’re not just wearing fabric. You’re wearing your creativity, your patience, your resilience.
That’s the real luxury.
Conclusion: You’re Not Just Crocheting—You’re Creating Identity
Let’s circle back to that feeling we started with—the feeling of wearing something made just for you.
Designing custom crochet garments isn’t about perfection. It’s about presence. It’s about saying, “I am here. I matter. I create.”
In a world of fast fashion and disposable trends, choosing to make your own clothes is a quiet act of rebellion. It’s slow. It’s intentional. It’s deeply human.
You don’t need to be an expert. You don’t need fancy tools. You just need to start—with a hook, a ball of yarn, and the courage to try.
Maybe today, you’ll make a swatch.
Maybe tomorrow, you’ll finish your first top.
And one day soon, you’ll stand in front of the mirror, smiling, knowing: I made this. And it’s perfect—because it’s mine.
So go ahead. Pick up your hook. Measure your body. Choose your yarn. Start small. Be patient. Make mistakes. Celebrate them.
And when you wear your first custom piece? Wear it with pride.
Because you didn’t just crochet a garment.
You crocheted your confidence.
What’s the first custom crochet garment you want to make?
Is it a cozy cardigan? A flowy summer dress? A hat with your favorite animal ears?
Drop your idea in the comments below—I’d love to cheer you on. And if this article helped you take your first step, please share it with someone who’s been dreaming of making something handmade. Together, let’s bring more soul back into fashion. 🧶💛

Gabriela Ferreira is a passionate crochet and knitting enthusiast who finds inspiration in every skein of yarn she touches. With a love for color, texture, and handmade detail, she brings creativity and warmth to each project she creates. Gabriela believes that every stitch tells a story, and she enjoys sharing her craft with others who appreciate the beauty of fiber arts.


