Introduction
Have you ever finished a crochet project only to realize your piece is way too wide—or too narrow—than the pattern called for? You’re not alone. One of the most frustrating yet easily preventable mistakes in crochet comes down to one simple skill: counting stitches and rows accurately.
Whether you’re making a cozy blanket, a delicate shawl, or a snug beanie, stitch and row counts are the backbone of your project’s shape, size, and symmetry. Skipping this step—even once—can throw off your entire piece. But don’t worry! With a little attention and the right techniques, anyone can master this foundational skill.
In this guide, we’ll walk you through everything you need to know to count crochet stitches and rows like a pro. You’ll learn why stitch counts matter, how to identify different stitches visually, tricks for staying consistent, and common pitfalls to avoid. Along the way, we’ll share practical tips to help you build confidence and prevent errors before they happen. By the end, you’ll not only understand how to count—but why it makes all the difference in your finished work.
Let’s dive in and turn guesswork into precision!
Why Accurate Stitch and Row Counts Matter
Imagine baking a cake where you “eyeball” the flour instead of measuring it. The chances of your cake rising properly? Slim. The same principle applies to crochet: every stitch is a building block, and missing or adding even one can ripple through your entire project.
Stitch and row counts ensure your piece matches the pattern’s intended dimensions. If you’re making a sweater sleeve, for instance, being off by just three stitches per row can lead to a sleeve that’s too tight or too loose after 20 rows. Similarly, afghans and scarves rely on consistent tension and measurements—if your stitch count drifts, you might end up with a wonky rectangle instead of a straight edge.
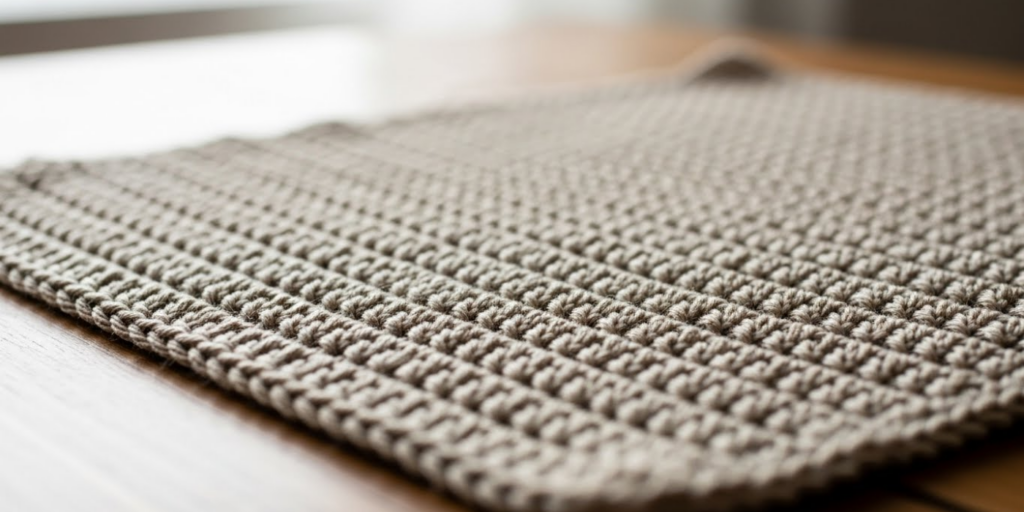
Beyond fit and shape, accurate counts also help maintain stitch patterns. Many textured stitches (like bobbles, shells, or cables) repeat over a specific number of stitches. Add or skip one, and the pattern breaks. Worse, you might not notice until several rows later, making fixes time-consuming.
The good news? Counting doesn’t require special tools—just awareness and a few seconds of your time. And once it becomes a habit, it transforms from a chore into a confidence booster. Every time you verify your count, you’re investing in a smoother, more satisfying crochet experience.
How to Identify and Count Different Crochet Stitches
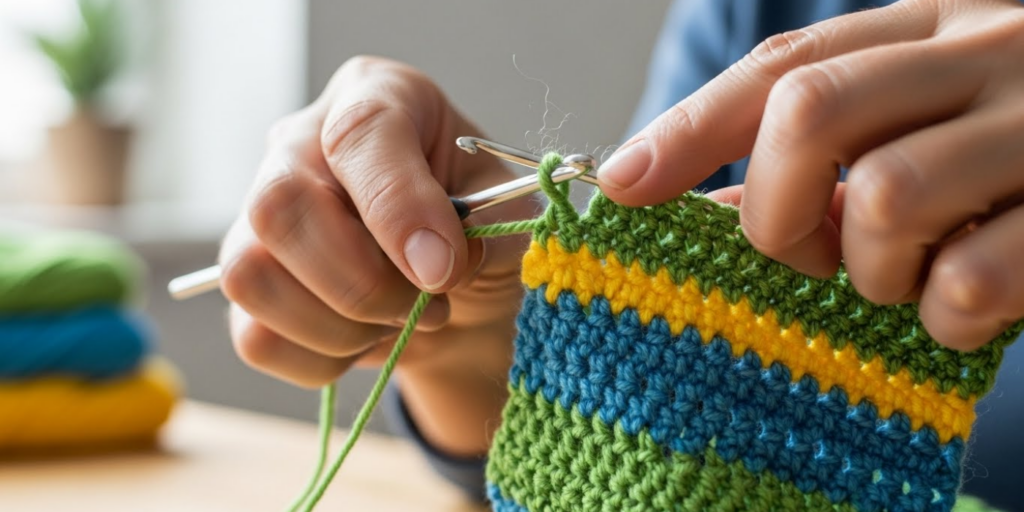
Before you can count stitches, you need to recognize what you’re looking at. Crochet stitches have distinct “signatures,” especially when viewed from the front of your work.
- Chain stitch (ch): Looks like a series of interlocking loops or “Vs” on the front, with a bumpy ridge on the back.
- Single crochet (sc): Appears as tight, even columns. Each stitch forms a clear “V” at the top.
- Half double crochet (hdc): Slightly taller than sc, with a subtle “third loop” on the back (useful for advanced techniques).
- Double crochet (dc): Taller and more open, with visible “posts” and a clear top V.
- Treble and taller stitches: Even more elongated, but still follow the same “one stitch = one V” rule at the top.
Pro tip: Always count the top “V” of each stitch—this is the standard reference point. Don’t count the loop on your hook (that’s your working loop, not a completed stitch), and be careful not to include the turning chain unless the pattern specifies it as a stitch.
For example, a row of 15 dc stitches should show exactly 15 clean “Vs” along the top edge. If you see 14 or 16, you’ve either skipped or added a stitch unintentionally.
When working in the round (like amigurumi or hats), count carefully around the full circle. Use a stitch marker to mark the beginning of each round—this prevents you from accidentally counting the same stitch twice or missing the starting point.
Practical Tips for Counting as You Go
Counting shouldn’t be a once-per-project chore—it should be part of your rhythm. Here’s how to make it effortless:
- Count at the end of every row or round. Yes, every single one—at least until you’re very confident. This takes 10 seconds and saves hours of unraveling later.
- Use stitch markers strategically. Place them every 10 or 20 stitches in long rows. This way, you’re counting smaller sections (e.g., “10 + 10 + 5”) instead of one long string of numbers.
- Mark your starting point. In flat rows, the first stitch after the turning chain is your anchor. In the round, always use a removable marker to flag Round 1.
- Keep a tally nearby. A small notebook, sticky note, or phone app can track row numbers. Some crocheters even write row numbers directly on pattern printouts.
- Slow down at pattern repeats. When a pattern says “repeat from * to *”, pause after each repeat and verify your count before moving on.
Bonus trick: If you’re working with dark yarn (which makes stitches hard to see), try using a bright contrasting thread for your starting chain or a light source with magnification. Some crafters even use white chalk or a fabric pencil to lightly mark every 5th stitch (washable on cotton blends!).
Remember: counting isn’t a sign you’re a beginner—it’s a sign you’re intentional about your craft.
Common Mistakes (and How to Avoid Them)
Even experienced crocheters make counting errors—but knowing the usual suspects helps you stay ahead:
- Mistaking the turning chain for a stitch.
Many patterns do not count the turning chain as a stitch, especially in single crochet. Always check your pattern’s notes! If it says “ch 1, turn, sc in second st from hook,” that ch-1 isn’t a stitch. - Skipping the first stitch.
After a turning chain, it’s easy to miss the very first stitch of the row—especially in dense fabrics. Train yourself to feel for that base stitch with your hook. - Adding extra stitches at the end.
Sometimes, in a hurry, you’ll work into the base of the turning chain or the edge loop, accidentally creating an extra stitch. Stick to the top V only. - Losing track in complex patterns.
Lace, colorwork, or textured stitches can obscure stitch tops. In these cases, count both visually and by touch. Feel the posts (the vertical parts) to confirm stitch placement. - Ignoring gauge swatches.
Even with perfect counts, if your tension is off, your finished size may still be wrong. Always make a swatch and count rows and stitches per inch as specified.
Fixing errors early is key. If you notice a mistake three rows back, don’t panic—use a smaller hook or your fingers to carefully “frog” (rip out) just enough to correct it. Better to lose 3 minutes now than 3 hours later!
Tools and Techniques to Make Counting Easier
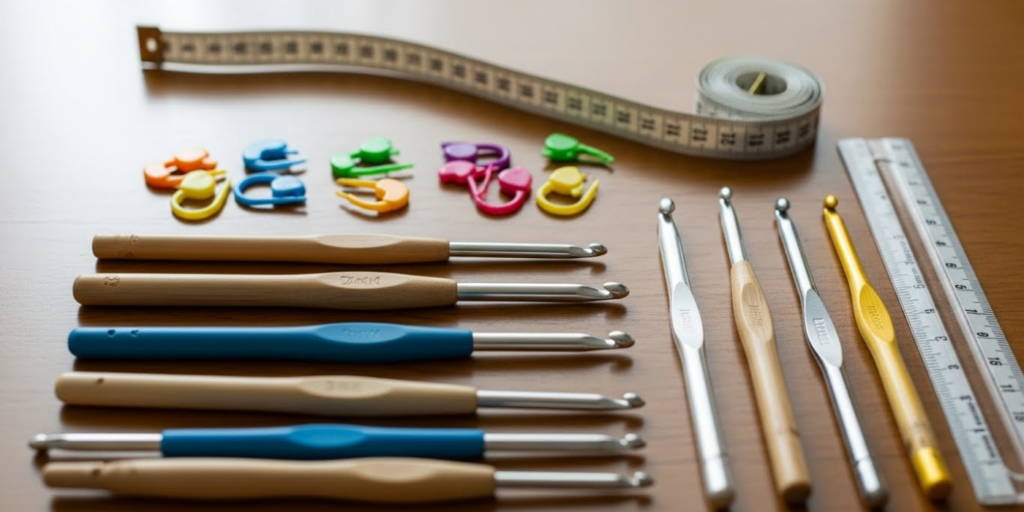
While your eyes and fingers are your primary tools, a few helpers can streamline the process:
- Stitch markers (split ring or locking): Essential for marking rounds, pattern repeats, or key points.
- Row counters: Mechanical or digital, these clip onto your hook or sit nearby to track rows hands-free.
- Printable row trackers: Downloadable PDFs let you check off completed rows—great for memory-intensive projects.
- Highlighter tape or sticky notes: Mark your place in written patterns so you don’t lose your spot mid-row.
- Phone voice memos: Say “Row 24 done, 42 stitches” after each row—handy when your hands are full!
For visual learners, YouTube tutorials showing stitch anatomy can be eye-opening. Watch how the top of a dc stitch differs from an hdc—and practice identifying them in your own swatches.
Also, consider lighting. Natural daylight or a high-CRI (color rendering index) LED lamp reduces eye strain and makes stitch definition clearer, especially with matte or fuzzy yarns.
And don’t underestimate the power of pausing. Set a timer to stop every 10 minutes and do a quick stitch check. This mindful break not only improves accuracy but also prevents repetitive strain.
The Bigger Picture: Confidence Through Consistency
Accurate stitch and row counting isn’t just about avoiding mistakes—it’s about building trust in your own abilities. Every time you verify your work and find it correct, you reinforce your skills. Over time, this quiet discipline translates into bolder projects: sweaters, garments, intricate lace—all made possible because you mastered the basics.
Think of counting as your crochet compass. It doesn’t limit your creativity; it guides it safely so you can explore complex patterns without fear. And when you gift a perfectly sized blanket or sell a flawless market piece, you’ll know those careful counts were your secret weapon.
More than that, this attention to detail reflects a deeper respect for your craft—and yourself. In a world of fast fashion and quick fixes, taking the time to count, correct, and care is a quiet act of artistry.
So the next time you pick up your hook, remember: precision is part of the joy. Each stitch is a choice, each row a step forward. And with every count, you’re not just making fabric—you’re weaving confidence, one loop at a time.
Conclusion
Counting crochet stitches and rows might seem like a small detail, but it’s the foundation of every successful project. From ensuring your garment fits to preserving intricate stitch patterns, accurate counts keep your work on track and your frustration at bay.
We’ve covered why these counts matter, how to identify different stitches, practical habits to build, common pitfalls to avoid, and helpful tools to support your journey. The key takeaway? Make counting a non-negotiable part of your process—not a last-minute check.
You don’t need perfection from day one. Just consistency. Count often, count gently, and forgive yourself when mistakes happen (they will!). With time, it becomes second nature—and your projects will reflect that care.
So, grab your hook, pick a new pattern, and give counting the attention it deserves. Your future self—and your finished pieces—will thank you.
Now we’d love to hear from you! What’s one project where counting stitches saved the day—or where a miscount taught you a valuable lesson? Share your story in the comments below, and don’t forget to share this guide with a fellow crocheter who’s ready to stitch with more confidence!

Gabriela Ferreira is a passionate crochet and knitting enthusiast who finds inspiration in every skein of yarn she touches. With a love for color, texture, and handmade detail, she brings creativity and warmth to each project she creates. Gabriela believes that every stitch tells a story, and she enjoys sharing her craft with others who appreciate the beauty of fiber arts.


