Introduction
You’ve followed the pattern perfectly, used the right hook, and counted every stitch—but when you hold up your work, the sides look wavy, slanted, or jagged. If this sounds familiar, you’re not doing anything wrong. Uneven edges are one of the most common frustrations for beginner crocheters, and the good news is: they’re totally fixable.
Creating clean, straight edges isn’t about talent—it’s about understanding a few key techniques that most tutorials gloss over. Whether you’re making a cozy blanket, a stylish scarf, or your first amigurumi, neat edges give your project a polished, professional look that boosts your confidence and pride in your work.
In this article, we’ll break down the four core reasons edges go wonky—and, more importantly, how to prevent or fix them. You’ll learn about turning chains, stitch placement, tension awareness, and pattern reading tips that make a real difference. No jargon, no overwhelm—just clear, practical advice you can apply to your very next row.
By the end, you’ll have the tools to turn those frustrating ripples and steps into smooth, satisfying sides. Ready to crochet with confidence? Let’s get those edges under control.
Why Edges Go Wonky: The Turning Chain Trap
One of the biggest culprits behind uneven edges is how you handle the turning chain—that little set of chains you make at the start of a new row to bring your hook up to the right height.
Here’s the issue: a turning chain isn’t always a stitch—but many beginners treat it like one. For example, with double crochet (dc), the pattern might say “ch 3, turn, dc in next stitch.” That ch-3 replaces the first dc, so you skip the first stitch of the row below. But if you accidentally work into that skipped stitch or forget to count the ch-3 as a stitch on the next row, your stitch count shifts—and your edge starts to slant.
This small inconsistency compounds over rows, creating a staircase effect or a flared side.
The fix? Know your stitch’s rules:
- Single crochet (sc): Ch 1 usually does not count as a stitch. Work your first sc into the first stitch of the previous row.
- Half-double crochet (hdc): Ch 2 may or may not count—check your pattern!
- Double crochet (dc): Ch 3 often counts as the first stitch, so skip the first stitch below.
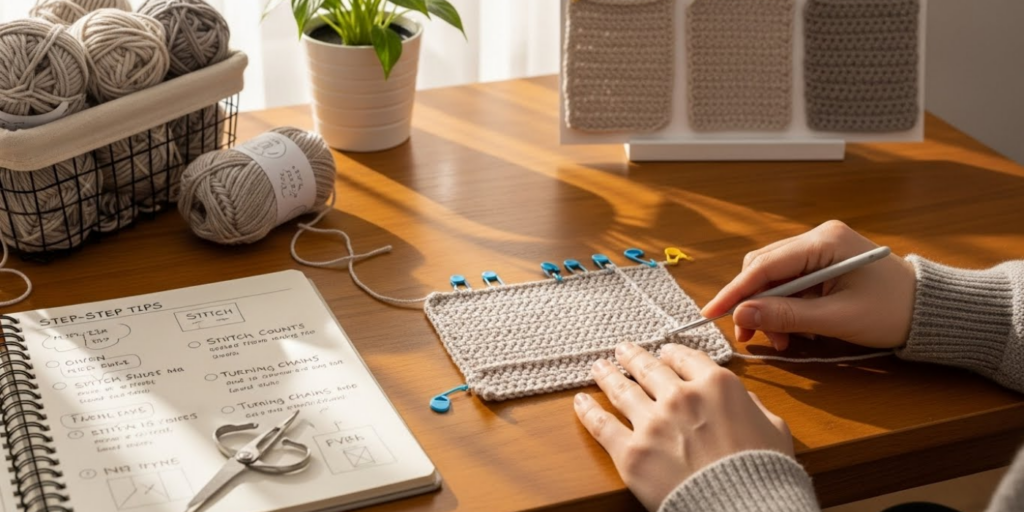
Pro tip: Place a stitch marker in the top of your turning chain (or the first real stitch) so you never lose count. This tiny habit prevents 80% of edge issues before they start.
Count Your Stitches—Every Single Row

Even if you nail the turning chain, inconsistent stitch counts will still warp your edges. It’s easy to accidentally add or drop a stitch when you’re learning—especially at the beginning or end of a row.
Imagine building a brick wall: if one row has 20 bricks and the next has 19, the wall leans. Crochet works the same way.
Make counting a non-negotiable habit.
- Count your stitches after every row for at least your first few projects.
- Use stitch markers every 10 stitches for wider pieces (like blankets). This makes counting faster and more accurate.
- If your edge is rippling outward, you’ve likely added stitches. If it’s pulling inward, you’ve dropped some.
Bonus: Try the “finger tap” method—lightly tap each stitch with your finger as you count. It’s tactile, slows you down, and reduces miscounts.
Don’t worry—this isn’t about perfection. It’s about consistency. A rectangle with 30 stitches per row will always have straighter edges than one that drifts between 29 and 31—even if your tension isn’t flawless.
Tension Matters—But Not in the Way You Think
Many beginners blame “bad tension” for uneven edges. While consistent tension helps, edge neatness has more to do with stitch placement than tightness.
That said, extreme tension changes at the edges can cause trouble. It’s common to crochet tighter on the first and last stitches of a row—either from nervousness, overcompensating, or awkward hand positioning. This makes the sides pull in, creating a tapered or hourglass shape.
How to even it out:
- Pause before the last stitch: Take a breath and consciously relax your grip.
- Use the same motion for edge stitches as center ones—don’t “squeeze” the last loop.
- Practice on a swatch: Make a 10-stitch practice square for a week. Focus only on keeping the sides smooth. You’ll build muscle memory fast.
Also, remember: tension evens out after blocking. Don’t judge your work too harshly before washing and pinning it (more on that later). Many “wonky” edges magically straighten with a little steam and patience.
The Power of the Chainless Starting Stitch (And Other Pro Tricks)
Ready to level up? Once you’ve mastered the basics, these techniques take your edges from “okay” to gallery-ready.
1. Chainless Starting Stitch
Instead of using a turning chain, this method mimics a real stitch at the row start—eliminating gaps and bumps. It works beautifully for double and half-double crochet. While it takes practice, the payoff is perfectly aligned vertical columns. Search “chainless dc tutorial” on YouTube—many visual learners find it game-changing.
2. Working into the Top of the Turning Chain
If your pattern doesn’t count the turning chain as a stitch, always work your last stitch of the next row into the top of that chain. This “closes the loop” and prevents ladders or holes at the edge.
3. Blocking: Your Secret Final Step
Blocking—gently wetting or steaming your finished piece and pinning it to dry—relaxes fibers and evens out minor inconsistencies. For acrylic, use steam (hover, don’t touch); for cotton or wool, wet-block. Even a quick steam can transform a wobbly scarf into a crisp accessory.
4. Use a Slightly Smaller Hook for Edging
When adding a border, switch to a hook one size smaller. This keeps the edge from flaring and gives a clean, tailored finish.
These aren’t “advanced” tricks—they’re accessible upgrades that any beginner can try after a few projects.
Patterns, Photos, and the Myth of “Perfect”
Before we wrap up, let’s address a quiet truth: most published photos are blocked, edited, and sometimes even stitched for perfection. Don’t compare your in-progress swatch to a magazine image.
Even experienced crocheters have off-tension days. What matters is progress, not perfection. Every row you count, every turning chain you mark, every blocked piece you admire—that’s growth.
Also, remember: some stitch patterns naturally create textured edges (like chevrons or bobbles). That’s not a mistake—it’s design! Save “straight edge” expectations for basic stitches like single or double crochet.
Your journey isn’t about matching someone else’s work. It’s about building your own reliable rhythm—one even edge at a time.
Conclusion: Straight Edges Start with Small Shifts
Creating even edges in crochet isn’t about innate skill—it’s about awareness, consistency, and a few smart habits. By mastering your turning chains, counting stitches faithfully, relaxing your edge tension, and using simple finishing techniques like blocking, you’ll see dramatic improvements in your work—often within just one project.
Don’t aim for flawless. Aim for intentional. Every time you correct a miscount or place a stitch marker, you’re not just fixing a row—you’re training your hands and mind to create with confidence.
So grab a scrap of yarn and hook, and try just one of these tips on your next swatch. Notice the difference. Celebrate it.
Now we’d love to hear from you: What’s your biggest edge struggle—slanting, rippling, or something else? Have you tried blocking yet? Share your experience or questions in the comments below. Your tip might be the one that helps another beginner finally get those edges just right!

Gabriela Ferreira is a passionate crochet and knitting enthusiast who finds inspiration in every skein of yarn she touches. With a love for color, texture, and handmade detail, she brings creativity and warmth to each project she creates. Gabriela believes that every stitch tells a story, and she enjoys sharing her craft with others who appreciate the beauty of fiber arts.


