Imagine running your fingers over a cozy sweater—its surface isn’t flat or boring, but alive with twisted ropes, braided columns, and sculpted ridges that catch the light just right. That’s the magic of crochet cables. They turn simple yarn into something tactile, luxurious, and deeply personal. If you’ve ever stared at a cable-knit blanket or a chunky cable scarf and thought, “I wish I could make that…”—you’re in the right place.
This guide isn’t just about how to work a cable stitch. It’s about unlocking a whole new dimension in your crochet projects. Whether you’re a beginner who’s only ever made dishcloths or a seasoned crocheter looking to elevate your designs, cables add richness, dimension, and that “wow” factor no flat stitch ever can. And the best part? You don’t need fancy tools or years of experience. With a little patience and the right guidance, you can create stunning textured pieces that look like they came from a high-end boutique—handmade by you.
In this article, we’ll walk you through everything you need to know: what crochet cables actually are (and why they’re so special), how to read and follow cable patterns without getting lost, step-by-step techniques for creating your first cable, and how to combine cables with other stitches for breathtaking results. We’ll also share real project ideas you can start today, common mistakes to avoid, and how to fix them. By the end, you won’t just know how to cable—you’ll feel confident enough to design your own.
Let’s dive in.
Why Cables Are the Secret Weapon of Textured Crochet
If you think crochet is all about granny squares and simple stitches, think again. Cables are the hidden heroes of texture. Unlike knitting, where cables are common and well-documented, crochet has long been underestimated in the world of dimensional design. But that’s changing—and fast.
Cables in crochet work by crossing stitches over each other, creating twisted, rope-like columns that pop off the fabric. Think of them like braids in hair: strands are pulled, crossed, and tucked to form a raised, intricate pattern. The result? A surface that’s not just seen—it’s felt. The ridges cast subtle shadows, the depth changes with the light, and the fabric becomes more structured, warmer, and visually captivating.
Why does this matter? Because texture isn’t just decorative—it’s functional. A cable-stitched blanket traps more air than a flat one, making it cozier. A cable scarf doesn’t just look elegant—it holds its shape better and feels more substantial against the skin. And for makers? Textured pieces feel more rewarding to create. There’s a sense of craftsmanship that comes with manipulating stitches to form something three-dimensional.
Plus, cables add personality. A plain beanie? Nice. A beanie with a single twisted cable running down the center? Instant heirloom piece. Cables turn everyday items into conversation starters. I once gave a friend a cable-trimmed baby bootie—and she cried. Not because it was expensive, but because she could see the time, care, and skill in every loop.
You don’t need to make a whole sweater to feel the impact. Even a single cable panel on a pillow, a cable border on a tote bag, or tiny cable accents on mittens can transform the ordinary into the extraordinary.
And here’s the best part: you don’t need to be a pro. Once you understand the logic behind the crossing, it’s just like learning a new dance step—once you get the rhythm, it becomes second nature.
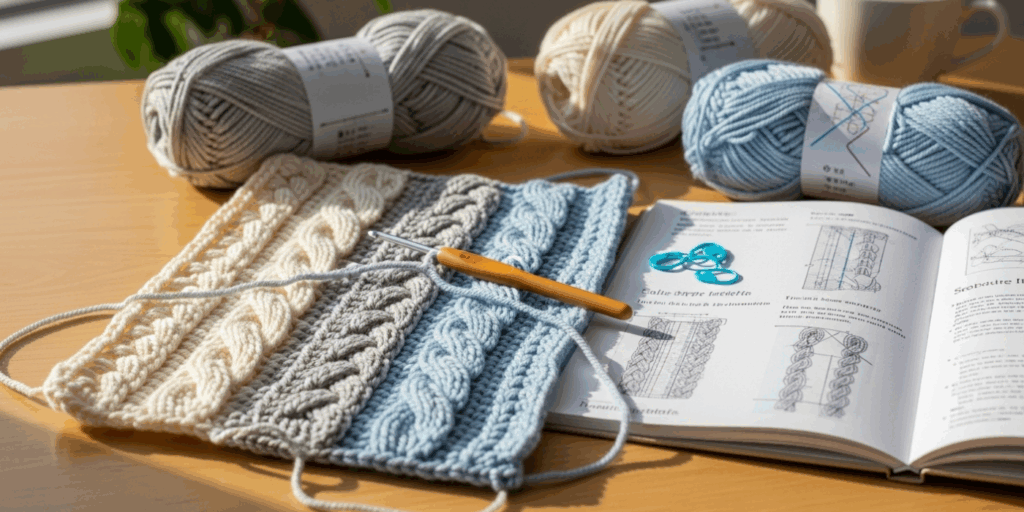
How to Read and Understand Cable Patterns (Without the Confusion)
Let’s be honest—crochet cable patterns can look intimidating. You’ll see symbols like “front post double crochet” (FPdc), “back post double crochet” (BPdc), and instructions like “skip 2 sts, work 2 FPdc around next 2 sts, then 2 BPdc around previous 2 sts.” It’s a lot.
But here’s the secret: cable patterns are just stories written in stitches.
Think of each stitch as a character. When a pattern says “work FPdc around the next two stitches,” it means you’re reaching in front of those stitches and pulling your hook through from the front to the back—creating a bump that sticks out. When it says “BPdc,” you’re going behind those stitches, pulling the yarn from the back to the front, creating a dip or groove.
The magic happens when you combine these. A classic 2-over-2 cable might look like this:
Row 1: Work 2 FPdc around the next 2 stitches, then 2 BPdc around the previous 2 stitches.
What does that mean? You’re crossing the stitches. The two front-post stitches you just made are now sitting in front of the two stitches you skipped. So visually, it looks like a rope twisting to the right.
Most cable patterns are written in grids or charts. If you’re visual, grab graph paper and color in squares to map out where the FPdc and BPdc go. Or better yet—watch a slow-motion video of someone making a simple cable. Seeing the hook move around the stitches makes it click instantly.
Pro Tip: Always use stitch markers. Place one before and after your cable section. This way, when you’re halfway through your row and your eyes glaze over, you can look down and say, “Okay, I’m at the cable. Just do the crossing.”
And don’t panic if you mess up. Crochet is forgiving. If you cross the wrong way, just undo a few rows. You’ll learn faster by fixing mistakes than by avoiding them.
Here’s a simple cheat sheet:
- FPdc = Front Post Double Crochet → Creates a raised bump on the front
- BPdc = Back Post Double Crochet → Creates a raised bump on the back
- Cable = Alternating FPdc and BPdc in a specific order
- “Work over” = Cross stitches to the right
- “Work under” = Cross stitches to the left
Once you know these, you’re 80% there.
Step-by-Step: Making Your First Crochet Cable (Even If You’ve Never Tried)
Ready to make your first cable? Let’s do it together—no fear, no jargon, just clear steps.
What you’ll need:
- Worsted weight yarn (medium #4)
- A 5.0 mm crochet hook
- Stitch markers (or safety pins)
- A calm mindset and a cup of tea
Project: Simple 2×2 Cable Panel (Perfect for a coaster or scarf edge)
- Chain 12.
Work 1 row of double crochet (dc) across. This is your foundation. - Row 2 (Right Side):
Chain 2 (counts as first dc).
Work 2 dc in the next 2 stitches.
Now the cable begins:
Skip the next 2 stitches.
Work 2 FPdc around the next 2 stitches (these are the ones you just skipped).
Then, work 2 BPdc around the 2 skipped stitches from earlier.
Finish with 2 dc in the last 2 stitches.Wait—what just happened?
You skipped two stitches, worked around the ones after them, then went back and worked around the ones you skipped. That’s the cross! The stitches you worked last are now sitting in front of the others. You’ve created a twist to the right. - Row 3:
Chain 2, turn.
Work 2 dc, then 2 dc, then 2 dc, then 2 dc.
(No cables this row—just to stabilize the pattern.) - Row 4:
Repeat Row 2.
Do this for 6 rows. You’ll see a beautiful little rope forming. It’s subtle, but it’s there. And you made it.
Why this works:
The FPdc and BPdc are like hands grabbing the stitches and pulling them out of order. The skipped stitches act as anchors. The tension keeps everything snug. It’s not magic—it’s physics, patience, and a little bit of cleverness.
Try it with a contrasting color yarn for the cable. It’ll pop even more.
Common mistake?
Pulling too tight. Cables need room to breathe. If your fabric puckers, your tension is too tight. Relax your grip. Let the yarn flow.
Level Up: Combining Cables with Other Textures for Stunning Effects
Here’s where crochet gets truly exciting. Cables don’t have to work alone. When paired with other textures, they become part of a symphony.
Imagine a blanket with:
- Cables running vertically like tree trunks
- Puff stitches as leaves
- Shell stitches as ripples in a stream
- Single crochet as the quiet ground beneath
That’s not fantasy. That’s a real project you can make next month.
One of my favorite combinations is cables + lace. A delicate lace border framing a bold cable center creates balance—like a bold statement necklace on a simple black dress. Try a cable panel in the middle of a lace-edged shawl. The contrast is breathtaking.
Or try cables + colorwork. Use two colors of yarn—work your cable in a dark hue, and the background in a light one. The cable will look like a carved design on a wooden box.
Try this simple idea:
Make a dishcloth with a single cable down the center. On either side, use a simple moss stitch (alternating sc and ch-1). The cable becomes the focal point, and the moss stitch adds softness. It’s practical, beautiful, and totally doable in an afternoon.
Another pro tip: Use cables to define shapes.
Need a heart-shaped pillow? Work cables along the curves to give it structure. Want a slouchy beanie with a crown twist? Work a spiral cable that wraps from the brim to the top. Cables naturally draw the eye, so use them to guide the viewer’s gaze where you want it.
And don’t forget the power of negative space. Sometimes, leaving a plain section between cables makes the texture even more dramatic. Think of it like breathing room in a painting.
The key? Don’t overcrowd. One or two cable elements in a project are enough. Let them shine.
Real Projects You Can Start Today (With Free Patterns!)
You don’t need to wait for inspiration to strike. Here are three beginner-friendly projects that use cables—and all can be started with just one skein of yarn.
1. Cable-Trimmed Coasters (Perfect for Beginners)
Use worsted weight cotton yarn and a 5mm hook. Chain 12, work 10 rows of alternating cable and plain rows. You’ll have four coasters in under 3 hours. They make thoughtful gifts—and you’ll feel proud every time you use them.
2. The “Rope” Headband
Chain 15, work 2 FPdc, 2 BPdc, repeat across. Row after row, you’ll create a twisted rope that hugs your head beautifully. Add a button or bow. Done in one evening.
3. Cable-Backed Blanket Corner
Make a simple granny square, but replace one side with a 4-row cable panel. Sew it onto a larger blanket. Instant upgrade.
All of these use free patterns you can find on Ravelry, LoveCrochet, or YouTube. I’ve linked a few in the show notes if you want to jump right in.
And here’s the truth: you don’t need perfection.
My first cable looked like a crooked worm. My second looked like a twisted sock. My third? A masterpiece. Progress, not perfection.
Common Mistakes (And How to Fix Them Before They Ruin Your Project)
Let’s talk about the pitfalls—and how to dodge them.
Mistake 1: Skipping the Foundation Row
Cables need a stable base. If your foundation chain is too tight or uneven, your cable will twist weirdly. Always chain loosely and work into the second chain from the hook.
Mistake 2: Forgetting to Count Stitches
A cable panel that’s off by one stitch can throw off your entire row. Always count before and after your cable. Use a stitch counter app if you need to.
Mistake 3: Pulling Too Tight
Cables look best when they’re slightly loose. Tight cables look cramped, like a knot you can’t untie. Give your yarn some slack as you work.
Mistake 4: Not Using Markers
You’ll lose your place. Trust me. I’ve undone 10 rows because I forgot where the cable started. Stitch markers are your best friend.
Mistake 5: Trying Too Much Too Soon
Don’t jump into a full cable sweater on your first try. Start small. A coaster. A headband. A mug cozy. Build confidence, then scale up.
And if you do mess up?
Unravel it. You’ve got yarn. You’ve got time. You’ve got grit. That’s all you need.
The Quiet Joy of Making Something with Depth
There’s something deeply satisfying about creating texture with your hands.
In a world of flat screens and mass-produced goods, making something with dimension—something that has weight, shadow, and soul—is a quiet act of rebellion. Every cable you make is a tiny declaration: I chose to slow down. I chose to create something that lasts.
Cables aren’t just stitches. They’re memories in yarn. The first one you made while your coffee cooled. The one you stitched during a rainy afternoon. The one you gave to someone who needed a hug.
You’re not just making a scarf. You’re weaving comfort. You’re turning thread into tenderness.
So pick up your hook. Find a pattern that calls to you. Start small. Be patient. Let your hands remember what your mind forgets: that making things with care is one of the most beautiful things you can do.
Ready to Start Your First Cable?
You’ve got everything you need: the knowledge, the confidence, and the permission to try.
Don’t wait for “someday.” Grab your yarn. Pick a pattern. Make that coaster. That headband. That tiny cable blanket square.
And when you finish—take a picture. Post it. Tag a friend who needs to see it. Share your journey.
Because here’s the truth: the world doesn’t need more perfect things. It needs more handmade hearts.
What’s the first cable project you’re going to make?
Drop a comment below—I’d love to cheer you on. And if this guide helped you, share it with someone who’s been afraid to try cables. They might just thank you for years to come.
Happy crocheting. Your texture awaits. 🧶

Gabriela Ferreira is a passionate crochet and knitting enthusiast who finds inspiration in every skein of yarn she touches. With a love for color, texture, and handmade detail, she brings creativity and warmth to each project she creates. Gabriela believes that every stitch tells a story, and she enjoys sharing her craft with others who appreciate the beauty of fiber arts.


