Introduction
Have you ever watched an experienced crocheter’s hands move effortlessly, stitches forming like magic, and wondered, “How do they make it look so easy?” Chances are, part of that seamless flow comes down to one foundational skill: how they hold their crochet hook and yarn.
While it might seem like a minor detail, your grip affects everything—from your tension and stitch consistency to your comfort and speed. Whether you’re a total beginner or have been crocheting for years, fine-tuning your hold can be a game-changer. In fact, many crocheters unknowingly struggle with wrist fatigue, uneven stitches, or slow progress simply because of how they’re holding their tools.
In this article, we’ll unpack the most common ways to hold your crochet hook and yarn, explore the pros and cons of each method, and guide you through finding the technique that works best for you. You’ll also learn practical tips to improve tension, avoid hand strain, and even boost your confidence as you create beautiful projects stitch by stitch.
Ready to crochet like a pro? Let’s get those hands in the perfect position!
The Two Main Ways to Hold a Crochet Hook: Pencil vs. Knife Grip
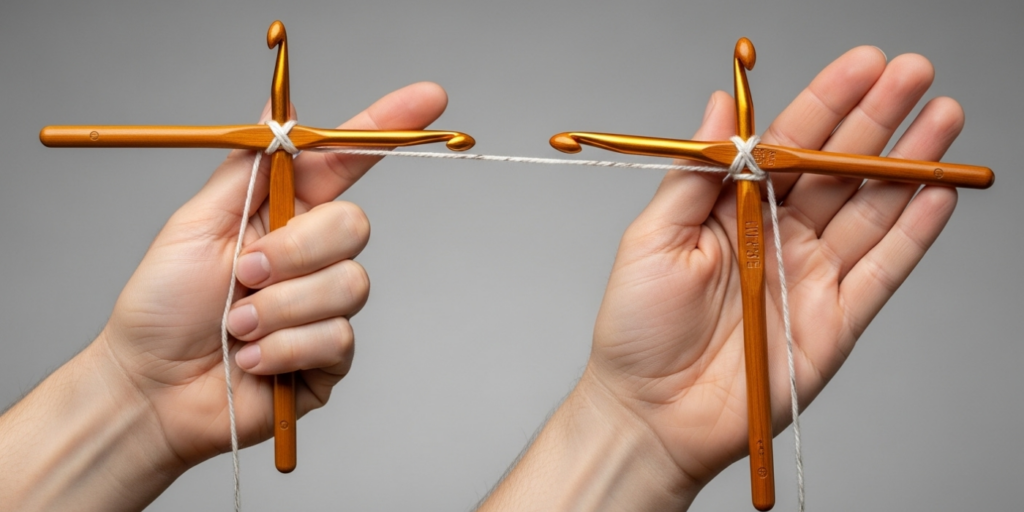
When it comes to holding your crochet hook, there are two classic styles: the pencil grip and the knife grip. Neither is “right” or “wrong”—it all comes down to personal comfort and what lets you work with control and ease.
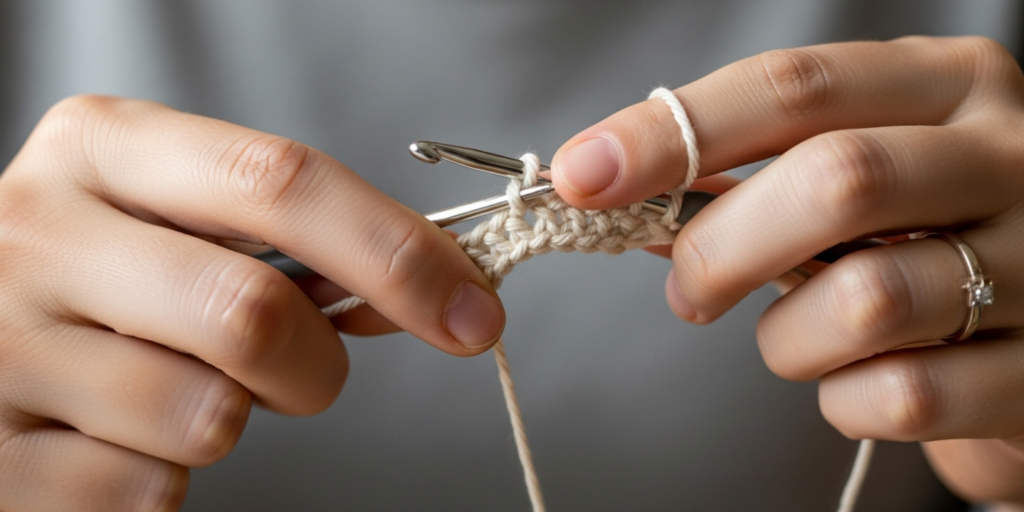
The pencil grip is exactly what it sounds like: you hold the hook like you would a pencil when writing. Your thumb and index finger rest near the thumb rest (or the tapered part just below the hook), while your middle finger supports the shaft. This method offers excellent precision, making it ideal for detailed work like lace, amigurumi, or intricate colorwork.
On the other hand, the knife grip involves holding the hook like you would a dinner knife—palm down, with your hand wrapped more fully around the hook. Your thumb still rests near the base of the hook for control, but your grip is looser and more relaxed. Many crocheters find this style reduces wrist fatigue during long sessions and allows for faster, more fluid stitching—especially with bulkier yarns.
So, which should you choose? Try both! Sit with your hook for a few minutes using each grip. Notice which feels more natural, which gives you better control over your stitches, and which causes less tension in your hand. Many pros actually switch between grips depending on the project!
Pro Tip: Adjust your hook’s position slightly toward your fingertips for more agility, or closer to your palm for more power and stability.
Mastering Yarn Tension: Why It’s More Important Than You Think
If your hook is the engine of your crochet, your yarn tension is the fuel. Too tight, and your stitches become stiff and hard to work into; too loose, and your fabric turns floppy and uneven. The secret to consistent tension lies not just in how you pull the yarn, but in how you guide it through your fingers.
Most crocheters wrap the yarn around one or more fingers of their non-dominant hand to create gentle, consistent tension. Here’s a simple method to start:
- Drape the yarn over your pinky finger from back to front.
- Bring it under your ring and middle fingers.
- Then wrap it over your index finger toward the hook.
This creates a natural “brake” system—your index finger controls how much yarn feeds through as you work. You can loosen or tighten the wrap based on how snug your stitches need to be.
Some crocheters use fewer fingers (just the index), while others involve all four for ultra-fine control. Again, experimentation is key. The goal isn’t rigidity—it’s smooth, adjustable tension that lets your stitches flow evenly without straining your hand.
Remember: Tension isn’t just about the yarn—it’s also about your mindset. Breathe, relax your shoulders, and avoid clenching. Crochet should feel rhythmic, not stressful!
Common Mistakes (and How to Fix Them)
Even seasoned crocheters fall into habits that sabotage their efficiency and comfort. Here are three frequent pitfalls—and simple fixes:
1. Death Grip on the Hook
Tightening your grip may feel like you’re “in control,” but it actually leads to hand cramps, slower movement, and inconsistent stitches.
✅ Fix: Consciously relax your fingers. Hold the hook just firmly enough to prevent slipping. Think “light touch,” not “vice grip.”
2. Letting the Yarn Dangle Freely
If you’re not guiding your yarn with your fingers, tension becomes erratic, and your stitches suffer.
✅ Fix: Practice the finger-wrap technique above for just 5 minutes a day. Muscle memory will kick in quickly!
3. Ignoring Ergonomics
Crocheting with your wrist bent at a sharp angle or hunched over your work can cause long-term strain.
✅ Fix: Sit upright, keep your elbows relaxed at your sides, and consider using an ergonomic hook with a soft grip or larger handle.
Bonus Tip: If your hands tire easily, try crochet thimbles or fingerless gloves with grip pads—they reduce friction and increase comfort during marathon sessions.
Finding Your Perfect Crochet Hold
Here’s the truth: there’s no single “correct” way to hold your hook and yarn. What works for your best friend might feel awkward to you—and that’s perfectly okay.
Your ideal hold depends on several personal factors:
- Your hand size and finger flexibility
- The type of yarn and hook you’re using
- The project you’re working on (a delicate shawl vs. a chunky blanket)
- Any physical limitations or conditions (like arthritis)
Instead of trying to mimic someone else exactly, customize your technique. Maybe you use a pencil grip with two fingers controlling the yarn for amigurumi, but switch to a knife grip with a looser wrap for granny squares. That’s not inconsistency—it’s adaptability.
One fun way to discover your natural style? Crochet blindfolded (safely, of course!). Without visual cues, your hands will default to what feels most intuitive. Pay attention to where your fingers rest and how the yarn flows—it might surprise you!
Real Talk: Even professional designers have “off days” with tension. Perfection isn’t the goal—comfort, consistency, and joy are.
Tools and Accessories That Can Help
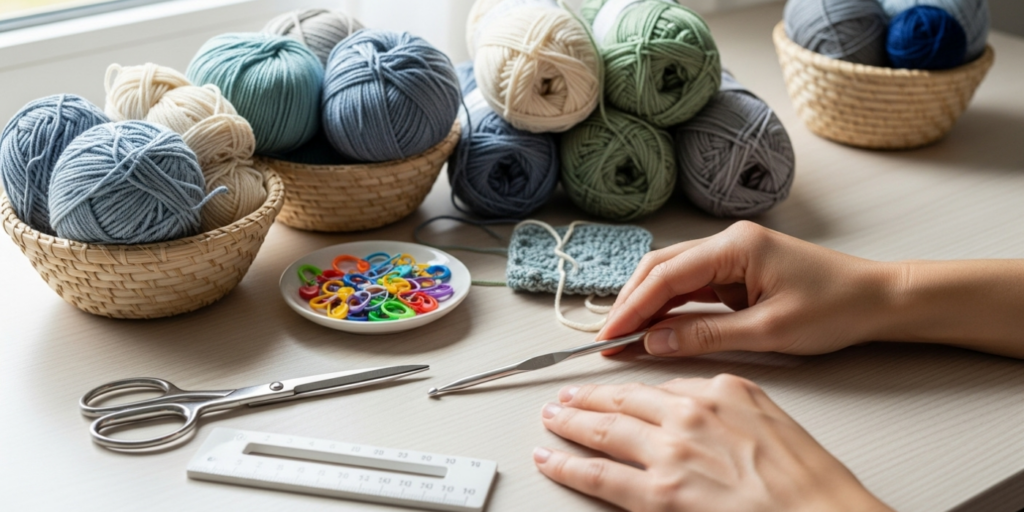
Sometimes, a small tweak in your toolkit makes a huge difference. Consider these supportive additions:
- Ergonomic Crochet Hooks: Brands like Clover, Furls, and Tulip offer hooks with contoured handles that reduce hand strain. Bamboo or resin hooks also provide a warmer, quieter feel than metal.
- Yarn Guides or Rings: These wearable tools (often worn on the pinky or index finger) help maintain even tension without finger fatigue—great for people with limited dexterity.
- Hook Grips: Silicone or foam sleeves that slide onto standard hooks to add cushioning and improve grip—ideal for slippery aluminum hooks.
- Adjustable Lap Desks: Keep your work at a comfortable height to avoid hunching, especially during long projects.
Don’t Overcomplicate It: You don’t need fancy tools to crochet well—but if you’re struggling with pain or inconsistency, one simple accessory might be the breakthrough you need.
Building Muscle Memory: Practice Exercises to Try
Like any physical skill, proper hook and yarn handling improves with mindful repetition. Try these short drills (just 5–10 minutes daily):
1. The Tension Test
Chain 20 stitches using your usual method. Then, without changing your yarn or hook, re-chain 20 more while consciously relaxing your grip and adjusting your yarn guide. Compare the two rows—notice any difference in stitch size or fabric drape?
2. Speed vs. Control Challenge
Time yourself making 10 single crochets as fast as possible. Then, do another 10 as slowly and deliberately as you can. Which set has more uniform stitches? Use this insight to find your personal balance.
3. Mirror Practice
Crochet in front of a mirror (or record yourself). Observe your hand posture, wrist angle, and finger movement. Are you tensing up? Is your elbow jutting out? Small adjustments here can prevent big problems later.
Consistency > Intensity: Short, focused practice beats hours of frustrated crocheting. Be patient—your hands will thank you.
Conclusion
Holding your crochet hook and yarn might seem like a small piece of the puzzle, but it’s the foundation of everything you create. The right technique brings comfort, control, and creativity—allowing you to focus less on mechanics and more on the joy of making.
We’ve explored the pencil and knife grips, demystified yarn tension, addressed common mistakes, and emphasized that your perfect hold is uniquely yours. Whether you’re crafting baby blankets, market-worthy accessories, or cozy sweaters, how you hold your tools directly shapes the experience—and the outcome.
So next time you pick up your hook, take a breath, check your posture, and ask: “Does this feel good? Is my tension smooth? Am I enjoying this?” If the answer is yes—you’re already crocheting like a pro.
Now it’s your turn! What’s your go-to hook hold? Have you switched styles over time? Share your tips or questions in the comments below—we’d love to hear what works for you. And if this guide helped you find a more comfortable way to crochet, don’t forget to share it with a fellow maker!
Happy stitching—you’ve got this! 🧶

Gabriela Ferreira is a passionate crochet and knitting enthusiast who finds inspiration in every skein of yarn she touches. With a love for color, texture, and handmade detail, she brings creativity and warmth to each project she creates. Gabriela believes that every stitch tells a story, and she enjoys sharing her craft with others who appreciate the beauty of fiber arts.


