
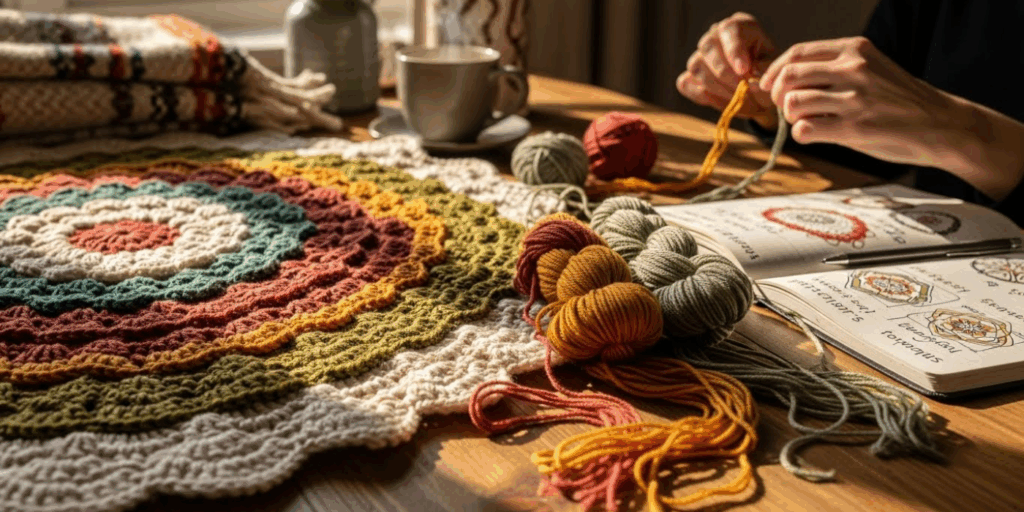
What if your finished crochet project wasn’t the end of the story—but just the beginning? Imagine taking a simple, solid-colored blanket and breathing new life into it with cascading florals, geometric accents, or soft waves of contrasting color—without unraveling a single stitch. That’s the magic of overlay crochet.
This beautiful technique lets you add dimension, personality, and artistry directly onto your completed fabric using surface stitches and contrasting yarns. Unlike traditional colorwork that requires meticulous planning from the first row, overlay crochet is forgiving, flexible, and perfect for makers who love to experiment after the base is done.
In this article, you’ll discover what overlay crochet really is, why it’s become a favorite among modern fiber artists, and how to get started—even if you’ve never tried surface crochet before. We’ll cover essential tools, beginner-friendly stitches, practical tips to avoid common mistakes, and inspiring project ideas that show just how transformative this method can be. Whether you’re looking to rescue a “meh” WIP or add a custom touch to a handmade gift, overlay crochet gives you the creative freedom to make it uniquely yours.
So grab your hook, choose a few skeins of yarn in complementary hues, and let’s explore how to turn ordinary fabric into something extraordinary—one layered stitch at a time.
What Is Overlay Crochet—and Why Crafters Love It
Overlay crochet (also known as surface crochet or applied crochet) is a technique where decorative stitches are worked on top of an already-finished piece of crocheted fabric. Instead of integrating color and texture during construction, you add them afterward—like painting on a canvas or embroidering on linen.
The base fabric—often made with simple stitches like single or double crochet—acts as a stable foundation. Then, using a contrasting or tonal yarn, you “draw” motifs, lines, or textured elements across its surface using slip stitches, single crochets, puff clusters, or other surface-friendly techniques.
This approach gained popularity in the early 2000s through the work of designer Melody MacDuffee, whose book Overlay Crochet featured stunning 3D afghans with roses, leaves, and intricate mandalas built entirely on top of solid backgrounds. Her designs showed how accessible stitches could create high-impact, sculptural effects without complex construction.
Why it resonates with today’s makers:
- It’s ideal for customization—add a name, date, or symbol to a gift.
- It saves time and yarn—no need to restart a project you’ve already finished.
- It’s low-pressure creativity—you can try, undo, and revise freely.
- It bridges skill levels—beginners and experts alike can find joy in it.
Unlike stranded colorwork or tapestry crochet, overlay doesn’t require managing multiple yarns or worrying about floats on the wrong side. You work one color at a time, cutting and rejoining as needed. This simplicity is part of its charm—and its power.
The Practical (and Emotional) Benefits of Overlay Crochet
Beyond its visual appeal, overlay crochet offers real, everyday advantages that make it more than just a decorative trick.
First, it supports mindful and sustainable crafting. In a world of fast fashion and disposable goods, overlay lets you breathe new life into existing pieces. That plain gray scarf? Now it’s a statement accessory with subtle texture. That baby blanket that felt “too basic”? Now it’s a cherished heirloom with a personalized touch. You’re not just making—you’re reviving.
Second, it builds creative confidence. Many crocheters avoid bold color or complex textures for fear of “ruining” a project after hours of work. With overlay, there’s no risk—because you’re working on top, not altering the structure. If you don’t love a motif, simply snip the overlay yarn and rework it. The base remains intact.
Third, it’s incredibly therapeutic. The rhythmic motion of surface stitching—like drawing with yarn—can be meditative. There’s no counting, no pattern to follow (unless you want one), just you and your hook, adding beauty one stitch at a time.
A real example: A maker on Ravelry shared how she used overlay crochet to honor her late grandmother by adding tiny forget-me-nots to a shawl she’d started but never finished. The project became both a memorial and a healing journey—something no store-bought item could replicate.
In short, overlay crochet isn’t just about aesthetics. It’s about connection, expression, and second chances—for your projects and for your creative spirit.
Getting Started: Choosing the Right Base, Yarn, and Tools
The good news? You don’t need special supplies to begin. Here’s what works best:
✅ The Base Fabric
Look for a firm, stable, and evenly stitched fabric. Ideal choices include:
- Single crochet (tight and smooth)
- Double crochet (slightly more open but still stable)
- Granny squares or mesh patterns (great for lace-like overlays)
Avoid very stretchy, loosely woven, or highly textured bases—they make it hard to anchor stitches evenly.
✅ Yarn Selection
- Use the same weight or one size lighter than your base yarn.
- Choose smooth, non-splitty fibers like cotton, acrylic, or wool blends for clean stitch definition.
- Contrast is key—but you can also use tonal shades for subtle elegance.
✅ Essential Tools
- A crochet hook 1–2 sizes smaller than your base hook (helps keep overlay stitches neat)
- A tapestry needle (for weaving in ends)
- Scissors
- Optional: Water-soluble fabric marker or straight pins to sketch your design lightly
Beginner tip: Practice on a swatch first! Make a 6″x6″ square in your favorite stitch, then try overlaying a simple spiral or leaf. This builds muscle memory without pressure.
Remember: your base doesn’t need to be perfect. Slight imperfections often disappear under layered texture—making overlay crochet wonderfully forgiving.
4 Easy Overlay Techniques to Try Right Away
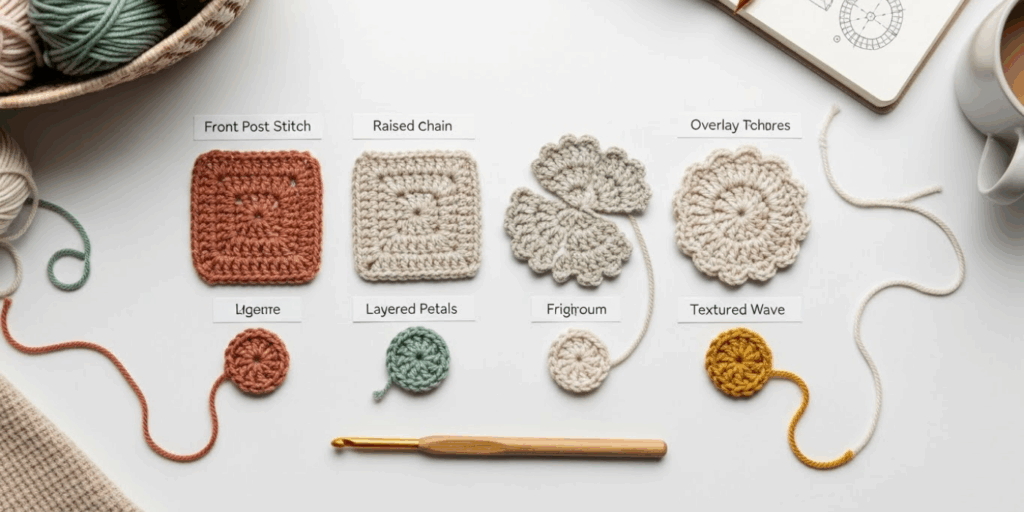
You don’t need advanced skills to create stunning effects. Here are four beginner-friendly methods that deliver big impact:
1. Surface Slip Stitch (The “Invisible” Line)
Use a small hook or tapestry needle to work slip stitches along the surface of your fabric, creating clean lines, outlines, or lettering. Keep tension even so the line lies flat and doesn’t pucker the base. Perfect for names, borders, or minimalist designs.
2. Single Crochet Dots and Grids
Work single crochet stitches directly into the base at regular intervals. This creates a stippled texture that mimics embroidery or pixel art. Try arranging dots into constellations, hearts, or abstract patterns.
3. Puff Stitch Clusters (3D Texture in Minutes)
To make a puff stitch: yarn over, insert hook, pull up a loop—repeat 4–5 times in the same spot, then yarn over and pull through all loops. These soft, raised “blossoms” add tactile depth and are ideal for flowers, snowflakes, or organic motifs.
4. Shell or Fan Edging Along Borders
Work a row of shell stitches (e.g., 5 dc in one stitch) along the edge of your piece, attaching them to the base with slip stitches. This adds a romantic, lacy finish to blankets, shawls, or table runners.
Quick project idea: Take a plain beanie and add a band of puff stitches in a contrasting color along the brim. It takes under 30 minutes and instantly upgrades the look.
Golden rule: Keep your tension loose enough that the base fabric doesn’t ripple. If it puckers, your stitches are too tight.
Common Beginner Mistakes—and How to Avoid Them
Even simple techniques have learning curves. Here are the top pitfalls and how to sidestep them:
❌ Pulling stitches too tight
This distorts the base fabric, causing ripples or curling.
✅ Fix: Relax your hands. Use a smaller hook for control, but let the stitches sit on the surface—they shouldn’t pull the fabric inward.
❌ Using yarn that’s too thick or fuzzy
Bulky or halo yarns can overwhelm delicate designs or blur stitch definition.
✅ Fix: Stick to worsted or DK weight smooth yarns for your first few projects. Save novelty yarns for later experiments.
❌ Freehanding without a plan
Jumping in can lead to uneven spacing or running out of space mid-motif.
✅ Fix: Lightly sketch your design with a water-soluble pen or mark key points with pins. Even a rough outline helps!
Analogy: Overlay crochet is like garnishing a dish. A sprinkle of fresh herbs elevates it—but dump the whole bunch, and you overpower the main course. Intention beats volume.
Also, weave in your ends securely—but only through the overlay stitches, not the base. This keeps removal easy if you ever want to change your design.
Inspiring Ways to Use Overlay Crochet in Real Life
Once you’re comfortable, the possibilities are endless. Here are five practical (and beautiful) applications:
🌸 Personalized Baby Items
Add a child’s name, birth date, or favorite animal to blankets, hats, or burp cloths using soft, washable yarn. Keep stitches flat for sensitive skin.
🖼️ Handmade Wall Art
Start with a neutral open-weave panel, then overlay mandalas, moons, or abstract lines in earthy or metallic tones. Frame it for instant gallery appeal.
🧥 Upcycled Garments
Transform a plain crochet vest or sweater with vines along the neckline, geometric patterns on sleeves, or a subtle ombré fade across the back.
🍽️ Elegant Tabletop Décor
Use fine cotton to overlay delicate lace motifs onto plain runners or placemats—ideal for holidays, weddings, or everyday beauty.
🛋️ Custom Throw Pillows
Revive solid pillow covers with bold motifs: monstera leaves, abstract waves, or even your favorite quote stitched in surface slip stitch.
Creative nudge: You don’t need a pattern. Look at leaves, architecture, or your own sketches for inspiration. A single feather traced in yarn can become a powerful focal point.
Many designers now sell overlay crochet patterns on Ravelry and Etsy—but the true joy lies in making it your own. Your stitches carry your story. Let them show.
Conclusion: Your Finished Fabric Is Just the Beginning
Overlay crochet teaches us a powerful lesson: completion isn’t finality—it’s an invitation. That plain scarf, that neutral blanket, that “almost-there” project? They’re not lacking. They’re waiting—for your color, your texture, your voice.
In this guide, we’ve explored how overlay crochet works, why it’s both practical and deeply expressive, what tools you need, and how to avoid common beginner stumbles. Most importantly, we’ve seen that you don’t need perfection to create something meaningful—just curiosity and the willingness to add one stitch on top of another.
So take that project you’ve been unsure about. Look at it not as finished, but as a quiet canvas ready for your signature.
Now we’d love to hear from you: What’s the first thing you’ll transform with overlay crochet?
Share your ideas, questions, or finished makes in the comments below—your creativity might inspire someone else to pick up their hook and play!
And if this article sparked your imagination, pass it along to a fellow maker who’s ready to add layers of color, texture, and soul to their craft. Happy stitching! 🪡✨

Gabriela Ferreira is a passionate crochet and knitting enthusiast who finds inspiration in every skein of yarn she touches. With a love for color, texture, and handmade detail, she brings creativity and warmth to each project she creates. Gabriela believes that every stitch tells a story, and she enjoys sharing her craft with others who appreciate the beauty of fiber arts.


