Introduction
Imagine a blanket that looks like a watercolor painting—soft gradients, unexpected pops of color, and rich textures that invite you to run your fingers over every ridge and ripple. That’s the magic of overlay crochet.
Unlike traditional crochet, where each stitch blends seamlessly into the next, overlay crochet intentionally builds layers on top of a base fabric, creating raised motifs, geometric patterns, or floral appliqués that seem to float above the surface. The result? Projects with stunning dimension, visual drama, and a handmade soul that flat stitches simply can’t replicate.
Whether you’re drawn to bold color blocking, delicate lace-like flourishes, or simply want to elevate a plain afghan into a statement piece, overlay crochet offers endless creative possibilities—and it’s more accessible than you might think.
In this guide, we’ll explore what overlay crochet really is, why it’s such a powerful technique for adding depth to your work, and how you can start using it—even if you’ve only mastered single and double crochet so far. You’ll discover essential tips for choosing colors and yarns, avoid common beginner mistakes, and get inspired by real-world project ideas. Plus, we’ll share simple step-by-step approaches to help you build confidence stitch by stitch.
Ready to add a new dimension to your crochet? Let’s dive in.
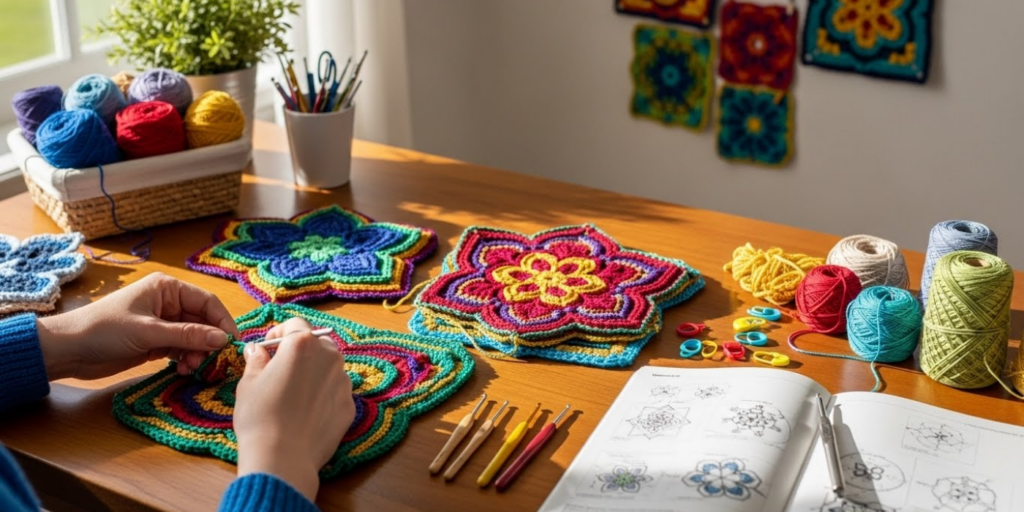
What Is Overlay Crochet? (And Why It’s So Special)
At its core, overlay crochet is a technique where decorative stitches or motifs are worked on top of a pre-made base fabric—usually a mesh, grid, or solid foundation. Instead of integrating color changes within rows (like tapestry or intarsia crochet), overlay crochet “draws” on the surface using slip stitches, clusters, picots, or even 3D flowers attached with a needle or hook.
Think of it like embroidery—but with yarn and a crochet hook.
This method gained popularity through designers like Melody MacDuffee, who pioneered modern overlay patterns featuring intricate floral vines and Celtic knots. But you don’t need to tackle a complex chart to enjoy its benefits. Even basic overlay—like adding a row of contrasting shell stitches along a blanket border—counts!
What makes overlay crochet so special?
- It adds instant visual interest to simple projects.
- It’s perfect for using up leftover yarn in creative ways.
- It allows color experimentation without tangled floats or complicated tension management.
- And perhaps most importantly—it transforms functional items into art.
Fun Fact: Overlay crochet is especially popular in garment design, where it’s used to create lace-like yokes or textured panels without increasing bulk.
Choosing Colors and Yarns That Sing Together
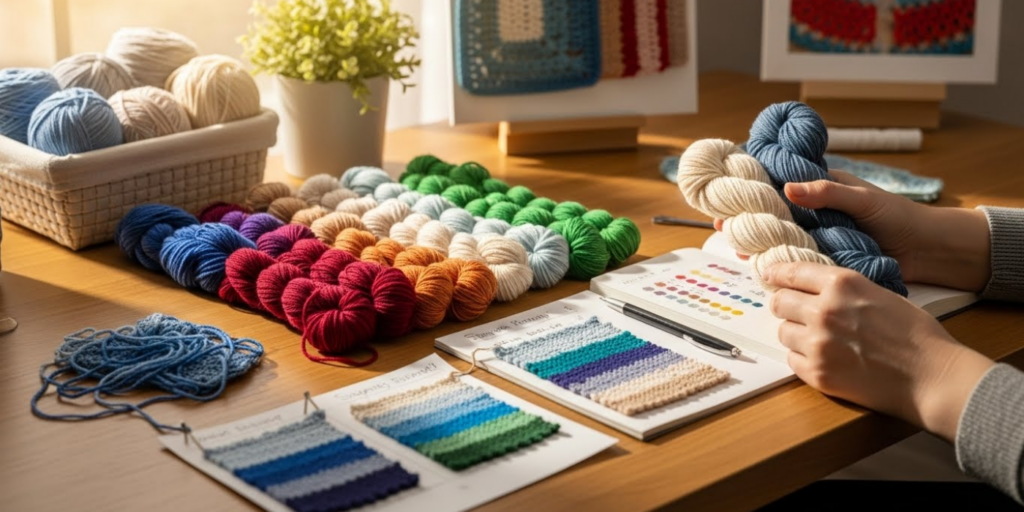
One of the biggest joys of overlay crochet is playing with color—but without thoughtful pairing, your layers can clash instead of complement.
Start with a neutral or solid-colored base. Cream, gray, navy, or soft sage green make excellent canvases because they let your overlay colors shine without competing. Then, choose 1–3 accent colors that either contrast boldly (like mustard on charcoal) or harmonize softly (like blush pink over taupe).
When it comes to yarn:
- Use the same weight for base and overlay whenever possible. Mixing bulky overlay on a lace base can distort the fabric.
- Smooth, non-splitting yarns (like cotton or acrylic blends) are ideal for clean, defined stitches.
- For 3D elements (like flowers or leaves), slightly fuzzier or textured yarns (such as wool or chenille) add charm and softness.
Pro Tip: Swatch first! Crochet a small square in your base yarn, then test a few overlay stitches in your accent colors. View it in natural and indoor light—you’d be surprised how lighting changes perception.
Color combo ideas to try:
- Ocean tones: Deep teal base + seafoam and coral overlay
- Earth palette: Olive green base + terracotta and cream
- Modern minimal: Black base + off-white and silver-gray accents
Remember: there are no hard rules—only what feels right to you.
Getting Started: Simple Overlay Techniques for Beginners
You don’t need advanced skills to begin overlay crochet. In fact, three basic techniques can take you far:
1. Slip Stitch Overlay
Use a contrasting color to “draw” lines or shapes across your base fabric by working slip stitches into specific stitches or spaces. Great for geometric patterns or modern line art.
2. Cluster or Bobble Accents
Add small 3D bumps by working 3–5 double crochets into the same stitch, then pulling through all loops at once. Place them sporadically for a playful, textured effect.
3. Surface Crochet (a.k.a. “Yarn Drawing”)
With your hook, pull loops of accent yarn through the base fabric without adding height—like sketching with yarn. Perfect for letters, vines, or abstract swirls.
Try This: Take a plain washcloth or dishcloth. Using a contrasting thread-weight yarn, add a tiny heart or star in one corner with surface crochet. Instant charm!
Start small. A pillow cover, tote bag, or baby blanket border gives you a manageable space to experiment without commitment. As you gain confidence, you can move to larger canvases like shawls or cardigans.
Common beginner mistake? Pulling overlay stitches too tight. Keep your tension light and flexible—these stitches should sit on the fabric, not warp it.
Designing Your Own Overlay Patterns: Where to Begin
Feeling inspired to create your own design? Fantastic! Overlay crochet is incredibly forgiving for improvisation.
Here’s a simple framework:
- Choose your base
A mesh stitch (like filet crochet) or a solid stitch (like single crochet in rows) works best. Make sure it’s stable and evenly spaced. - Sketch your idea
Use graph paper or a digital app to map out where you want your overlay elements. Even a rough doodle helps! - Mark key points
Use stitch markers or tailor’s chalk to indicate where your overlay will go. This prevents wonky spacing. - Work from bottom to top or center outward
This keeps your hands from dragging across finished sections and smudging your “yarn painting.”
Analogy Time: Think of your base fabric as a blank wall—and your overlay yarn as paint. You wouldn’t start painting in the middle of a mural without planning, right? Same principle!
Don’t be afraid to mix techniques. Combine slip-stitch outlines with bobble centers, or frame a surface-crocheted monogram with a raised shell border. The layering is what creates depth.
And remember: mistakes can become features. A slightly off-center flower? Call it “organic.” A wobbly line? It’s “hand-drawn charm.”
Project Ideas to Spark Your Creativity
Need inspiration? Here are five overlay-friendly projects that range from quick to ambitious:
- Boho Wall Hanging
Start with a linen-textured base, then overlay with macramé-style knots, tassels, and dangling chains in earthy tones. - Personalized Tote Bag
Crochet a solid cotton tote, then add your initials or a tiny constellation in surface crochet. - Floral Throw Blanket
Use a neutral bulky yarn for the base, then attach pre-made 3D crochet flowers in pastels for a cottagecore vibe. - Textured Pillow Covers
Overlay geometric patterns (like chevrons or diamonds) using slip stitches in metallic yarn for a modern glam look. - Lace-Effect Cardigan
Work a simple raglan base, then add an openwork overlay along the yoke and cuffs for elegance without complexity.
Bonus: Overlay crochet is perfect for gifts. A plain scarf becomes deeply personal with a single embroidered initial or a tiny heart near the hem.
Troubleshooting Common Overlay Challenges
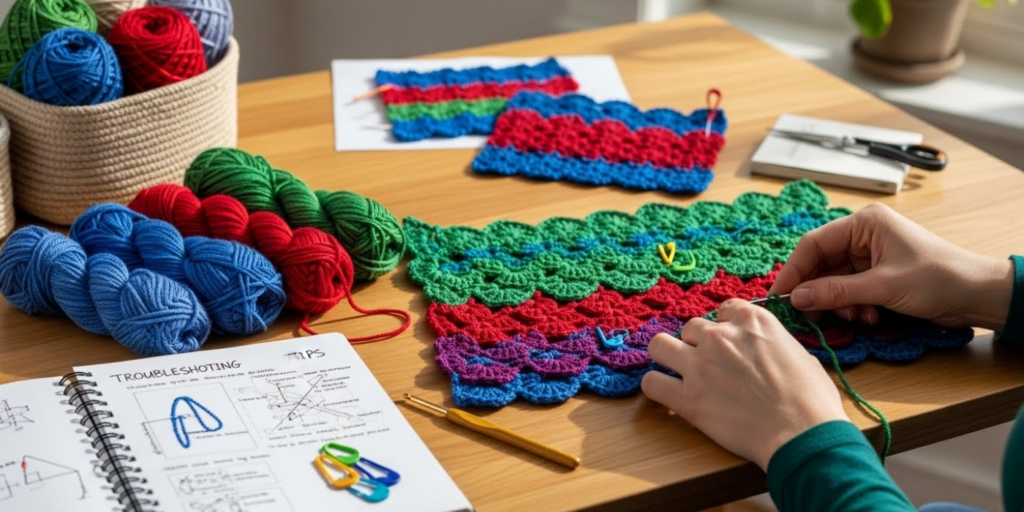
Even experienced crafters hit snags. Here’s how to handle the most frequent issues:
Problem: Overlay stitches are too stiff or pull the fabric inward.
✅ Solution: Use a hook one size larger than your base for the overlay. This creates looser, more flexible stitches.
Problem: The back looks messy or tangled.
✅ Solution: Carry yarn only short distances (under 3–4 stitches). For longer jumps, cut and rejoin—neatness matters less on the back, but excessive bulk can cause puckering.
Problem: Colors look muddy or dull together.
✅ Solution: Step back! View your work from 3–5 feet away. Sometimes colors that seem “off” up close blend beautifully at a distance.
Problem: Motifs won’t stay flat.
✅ Solution: Lightly steam-block your finished piece (check yarn care instructions first!). Blocking relaxes fibers and evens out tension.
Mindset Shift: Overlay crochet isn’t about perfection—it’s about expression. Embrace the handmade wobble.
Conclusion
Overlay crochet is more than a technique—it’s a doorway to self-expression, creativity, and transformation. With just a hook, some leftover yarn, and a willingness to experiment, you can turn ordinary fabric into something extraordinary.
We’ve covered the basics: what overlay crochet is, how to choose harmonious colors and yarns, beginner-friendly methods, and ways to design your own patterns. We’ve also shared project ideas and troubleshooting tips so you can move forward with confidence.
The beauty of this method lies in its flexibility. There’s no “wrong” way to overlay—as long as it brings you joy and makes your project uniquely yours. So don’t wait for the “perfect” moment or the “right” skill level. Grab that scrap of yarn, pick a plain swatch, and start layering.
Your hands—and your heart—will thank you.
Now we’d love to hear from you: Have you ever tried overlay crochet? What’s the first design you’d love to try? Share your thoughts, photos, or questions in the comments below! And if this guide sparked an idea, why not share it with a fellow maker who loves texture and color as much as you do?
Happy crocheting—you’re not just making stitches. You’re weaving stories, one layer at a time. 🧶

Gabriela Ferreira is a passionate crochet and knitting enthusiast who finds inspiration in every skein of yarn she touches. With a love for color, texture, and handmade detail, she brings creativity and warmth to each project she creates. Gabriela believes that every stitch tells a story, and she enjoys sharing her craft with others who appreciate the beauty of fiber arts.


