Introduction
Imagine wrapping yourself in a cozy blanket—only to realize the “wrong side” is a tangle of bumpy loops and uneven texture. Or gifting a handmade scarf, only for the recipient to ask, “Which side faces out?” If you’ve been there, you’ll appreciate the magic of reversible crochet stitches: patterns that look just as beautiful on the back as they do on the front.
Unlike many traditional crochet stitches that create a clear “right” and “wrong” side, reversible stitches offer symmetry, balance, and versatility—making them perfect for scarves, blankets, dishcloths, and even garments where both sides will be seen. They also eliminate the stress of hiding messy backs or worrying about flipping your work mid-project.
In this article, we’ll explore why reversible stitches matter, highlight five standout reversible crochet patterns (complete with practical tips), and show you how to choose the right one for your next project. Whether you’re a beginner looking for clean, consistent results or an experienced crocheter seeking elegant new textures, you’ll find inspiration and actionable guidance here.
So grab your hook and yarn—let’s dive into a world where every stitch shines, no matter which way you turn it.
Why Reversible Stitches Matter (Beyond Just Looking Pretty)

At first glance, reversible crochet might seem like a “nice-to-have” rather than a necessity. But for many projects, it’s a game-changer.
Consider a market bag: if it’s made with a standard single or double crochet, the inside often looks looser and less polished. With a reversible stitch, both sides are equally sturdy and attractive—ideal when your bag flips inside out at the grocery store! Similarly, baby blankets are frequently flipped, folded, and handled from all angles. A reversible pattern ensures there’s no “bad” side, just soft, consistent texture.
Reversible stitches also reduce finishing work. No need to line your scarf or hide seams—just crochet and wear or use as-is. This is especially helpful for charity projects or quick gifts where time matters.
Moreover, these stitches often have better drape and structure. Because both sides mirror each other, the fabric tends to lie flatter and resist curling—a common frustration with basic stitches like single crochet.
And let’s not forget aesthetics. There’s a quiet elegance in symmetry. A reversible stitch says, “I care about the details—even the ones most people won’t see.” In a craft world that often prioritizes speed over precision, that intentionality stands out.
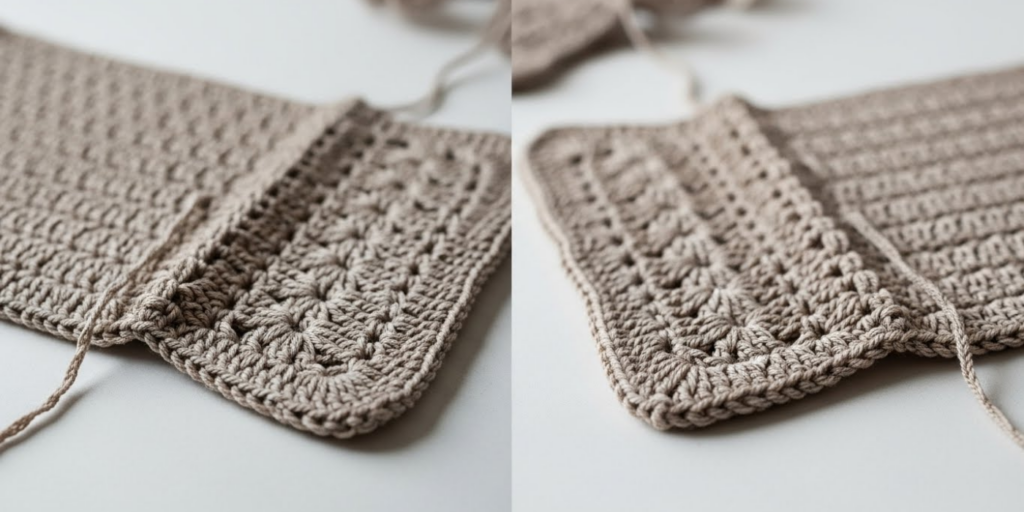
The Linen Stitch: Simple, Textured, and Fully Reversible
One of the most beloved reversible stitches among crocheters is the Linen Stitch (also known as the Moss Stitch or Woven Stitch). Despite its woven, sophisticated look, it’s made with just two basic stitches: chain and single crochet.
How it works:
- Row 1: Chain an odd number. Sc in the 4th ch from hook, ch 1, skip 1 ch, sc in next ch. Repeat to end.
- Row 2: Ch 2 (counts as first ch + skipped ch), sc in next ch-space, ch 1. Repeat across, ending with sc in the last ch-2 space.
- Repeat Row 2 for pattern.
What makes the Linen Stitch special is its grid-like texture that looks identical on both sides. The alternating chains and single crochets create small “boxes” that mimic linen fabric—hence the name. It’s dense enough for dishcloths or placemats, yet flexible enough for lightweight scarves or shawls.
Pro tip: Use a hook one size larger than usual. Because the stitch is tight, a bigger hook prevents stiffness and improves drape.
Because it lies flat and doesn’t curl, it’s also ideal for beginners practicing tension control. And since it uses simple repeats, it’s easy to memorize—perfect for mindful, screen-free crafting.
The Ribbed Reversible Stitch: Stretch, Structure, and Style
If you’ve ever wished your crochet could mimic the stretchy comfort of knitted ribbing, the Reversible Rib Stitch will feel like a revelation. This stitch creates vertical ridges that look the same on both sides—offering elasticity without sacrificing structure.
Typically worked in multiples of 2, the pattern alternates front post and back post double crochets (FPdc and BPdc). While post stitches might sound advanced, they’re easier than they seem: you simply work around the post of the stitch below instead of into the top loops.
Why it’s reversible: The front post on one side becomes the back post on the other, creating mirrored ridges. Flip it, and you can’t tell which side you started on!
This stitch shines in cuffs, collars, headbands, and waistbands—anywhere you need a snug but flexible fit. But don’t limit it to edgings! A full scarf in ribbed reversible stitch drapes beautifully and hugs the neck without bulk.
Bonus: It’s naturally wrinkle-resistant and holds its shape wash after wash—great for travel accessories or everyday wear.
If you’re new to post stitches, practice on a small swatch first. Use smooth, light-colored yarn so you can clearly see the posts. Once you get the rhythm, you’ll wonder how you ever lived without this stitch!
The Seed Stitch (Crochet Version): A Classic Made Reversible
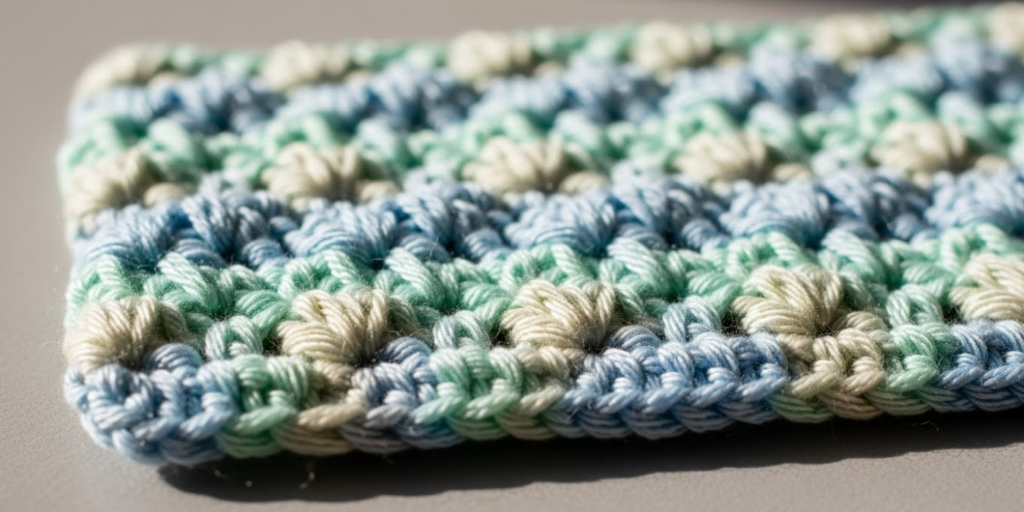
You might know Seed Stitch from knitting—but yes, there’s a crochet version, and it’s wonderfully reversible! This stitch alternates single crochets and chains in a staggered pattern, creating a bumpy, organic texture that’s identical on both sides.
Basic pattern:
- Chain an even number.
- Row 1: Sc in 2nd ch from hook, ch 1, skip 1 ch, sc in next ch. Repeat to end.
- Row 2: Ch 1, sc in first sc, ch 1, sc in next ch-space. Repeat, ending with sc in last sc.
- Repeat Row 2.
The magic lies in the offset placement: each chain sits over a single crochet from the row below, and vice versa. This symmetry ensures both sides look the same—just flipped.
The crochet Seed Stitch is lightweight and airy, making it perfect for summer wraps, baby blankets, or delicate shawls. It’s also beginner-friendly, as it uses only two basic techniques.
One of its best features? It hides minor tension errors. Because the texture is intentionally irregular, slight inconsistencies blend right in—ideal for nervous new crocheters or those using hand-spun yarns.
Try it in cotton or bamboo yarn for a crisp, clean finish, or in wool blends for extra warmth without weight.
The Two-Color Reversible Wave Stitch: Bold, Graphic, and Double-Sided
Ready to level up? The Two-Color Reversible Wave Stitch (a variation of the Bavarian or Chevron stitch) creates bold zigzags that look identical on both sides—but in reversed colors. When you flip the fabric, the background becomes the foreground, and vice versa!
This stitch is worked in stripes using two colors, with cleverly placed decreases and increases that mirror each other. The result? A dynamic, graphic fabric that’s perfect for throws, pillows, or modern fashion accessories.
Key tip: Use high-contrast colors (like navy and cream or mustard and gray) to make the wave pattern pop. Also, carry your unused yarn loosely along the side to avoid gaps—don’t cut and rejoin every row.
While it requires a bit more counting and attention, the payoff is huge. This stitch makes a statement without extra embellishment. And because it’s reversible, your pillow cover or blanket will look intentional from every angle—even when tossed on the couch or folded at the foot of a bed.
Designers love this stitch for gender-neutral baby blankets, where symmetry and visual balance feel calming and cohesive.
Just be patient with the first few rows. Once the pattern clicks, it becomes rhythmic and satisfying—like creating optical art with yarn.
Choosing the Right Reversible Stitch for Your Project
With so many options, how do you pick the best reversible stitch for your needs? Consider these three practical questions:
- What’s the purpose of the item?
- Need stretch? Go for Ribbed Reversible.
- Want absorbency? Linen Stitch is perfect for kitchen cloths.
- Creating a drapey scarf? Try Seed Stitch or Linen in a fingering-weight yarn.
- What’s your skill level?
- Beginners: Start with Linen or Seed Stitch—both use basic techniques.
- Intermediate: Try Ribbed Reversible to learn post stitches.
- Advanced: Dive into Two-Color Wave for colorwork practice.
- What yarn are you using?
- Smooth, solid colors show texture best.
- Avoid highly variegated or fuzzy yarns—they can obscure the stitch definition.
Remember: swatching is your friend. Make a 4″x4″ sample in your chosen stitch and yarn. Wash and block it if possible. This tells you everything—drape, density, reversibility, and whether you actually like how it feels.
And don’t be afraid to mix stitches! A blanket could have a Linen Stitch border with a Seed Stitch center—both reversible, both complementary.
Final Thoughts: The Quiet Confidence of Reversible Design
Reversible crochet stitches embody a subtle philosophy: care in every detail, even the unseen ones. In a fast-paced world of quick makes and instant gratification, choosing a reversible stitch is a small act of craftsmanship. It says you value balance, function, and beauty—not just on the surface, but all the way through.
Whether you’re making a gift that will be cherished for years or a dishcloth that brings quiet joy to daily chores, these stitches ensure your work looks intentional from every angle. And that’s a kind of confidence no one can take away—because it’s woven into every row.
So next time you pick up your hook, ask yourself: Could this project be even better if both sides were beautiful? Chances are, the answer is yes.
Now we’d love to hear from you: Which reversible stitch are you excited to try first? Have you used one in a project that surprised you with its versatility? Share your story in the comments below—your experience might inspire someone else to flip their crochet perspective! 🧶

Gabriela Ferreira is a passionate crochet and knitting enthusiast who finds inspiration in every skein of yarn she touches. With a love for color, texture, and handmade detail, she brings creativity and warmth to each project she creates. Gabriela believes that every stitch tells a story, and she enjoys sharing her craft with others who appreciate the beauty of fiber arts.


